POST DEPLOYMENT STEPS FOR AWX V19.3 (deployed manually)
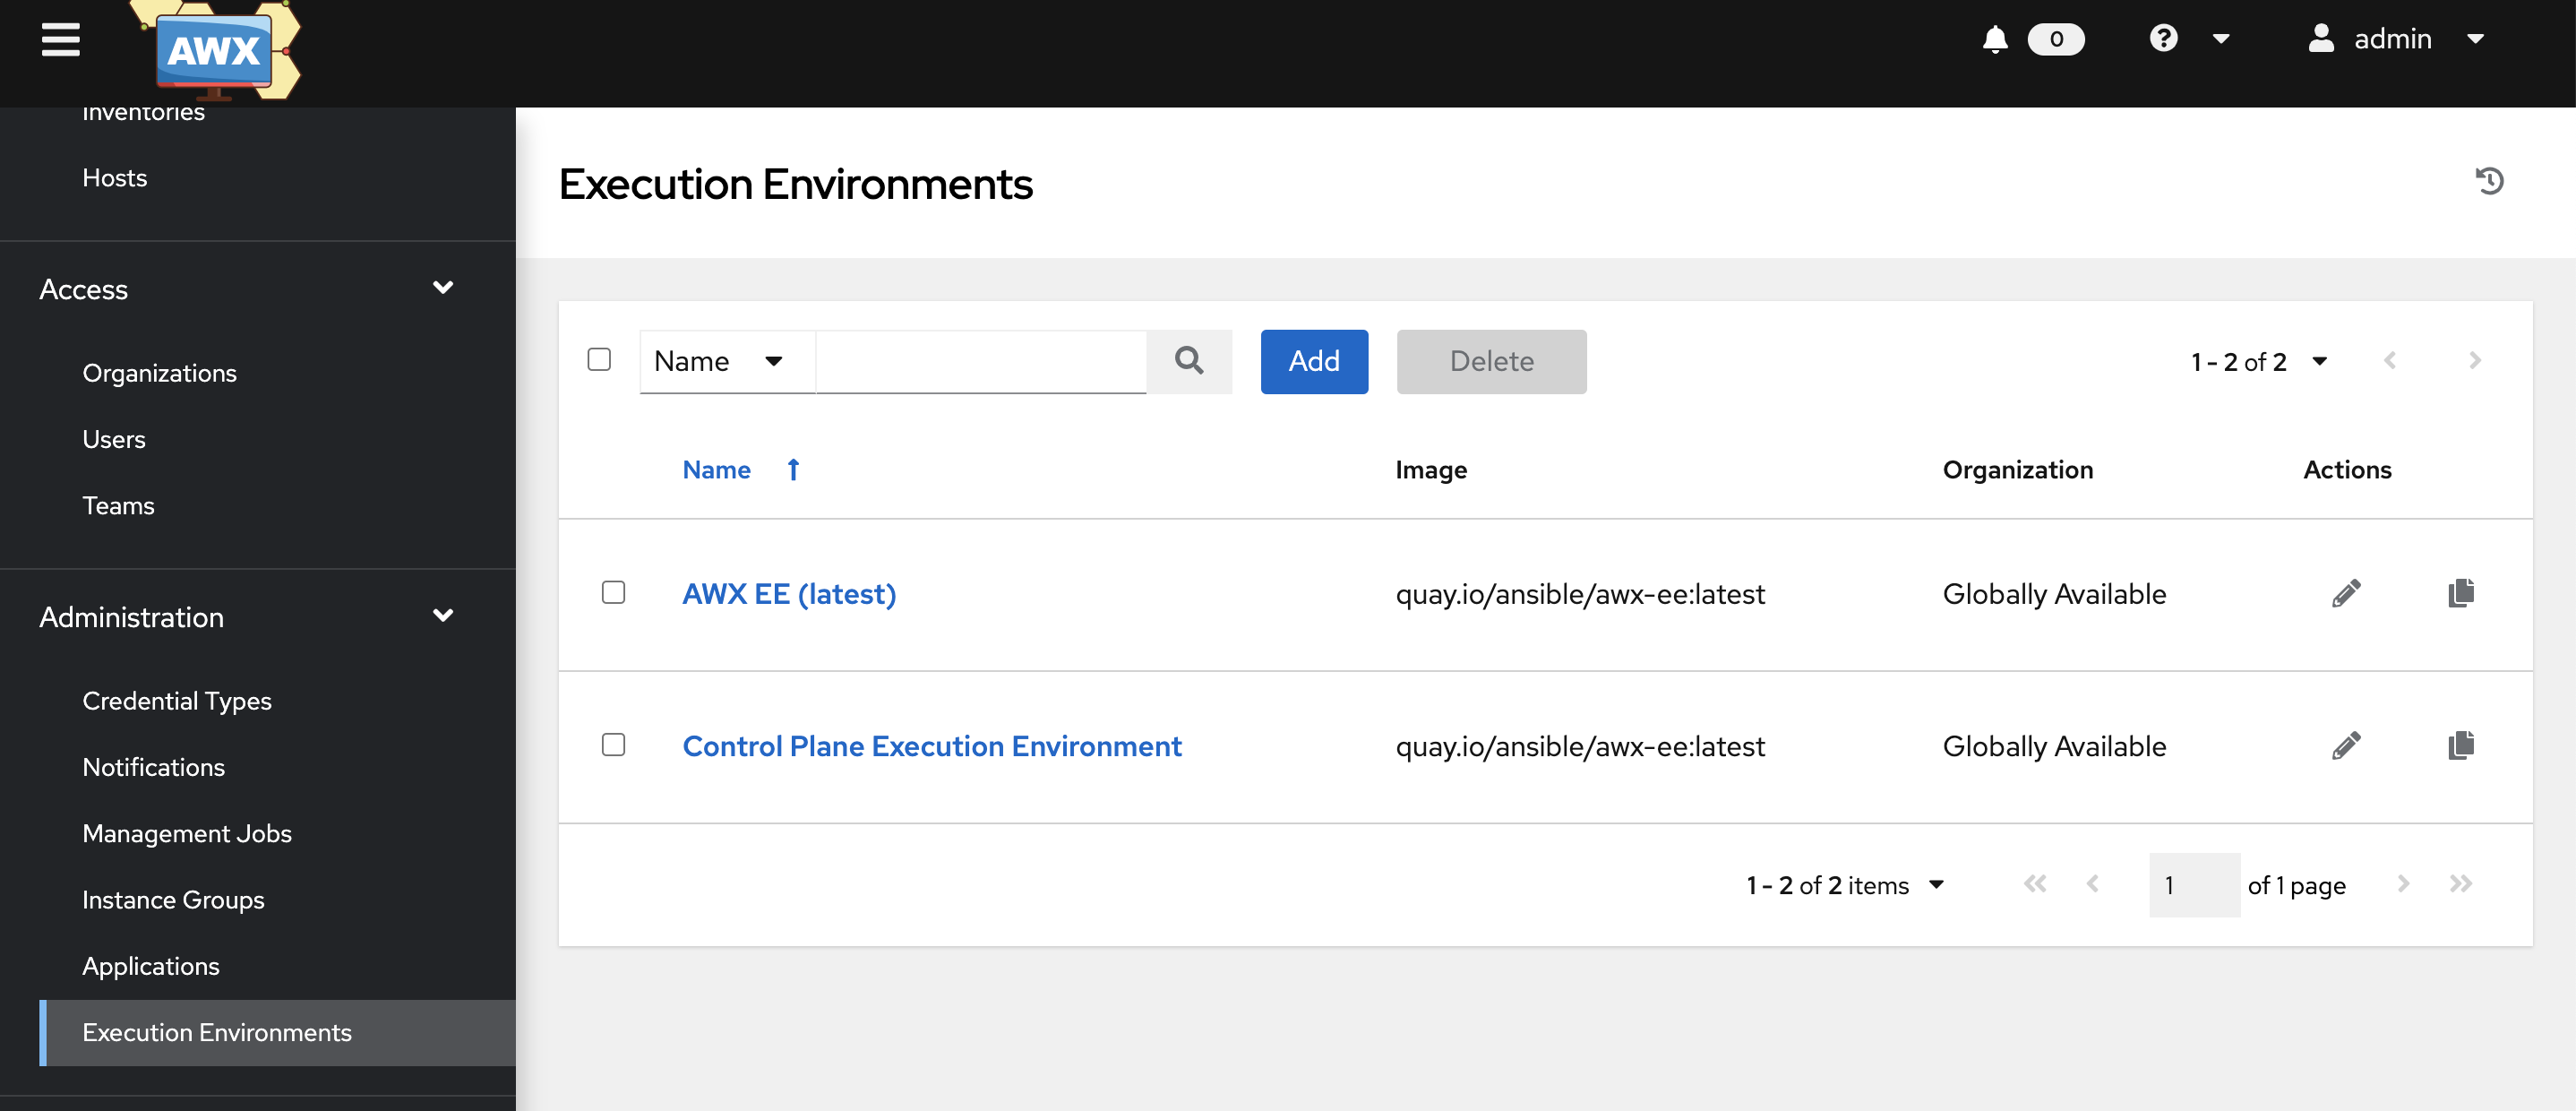
1)Once the AWX deployment is complete. Log In into AWX UI and add Execution environment
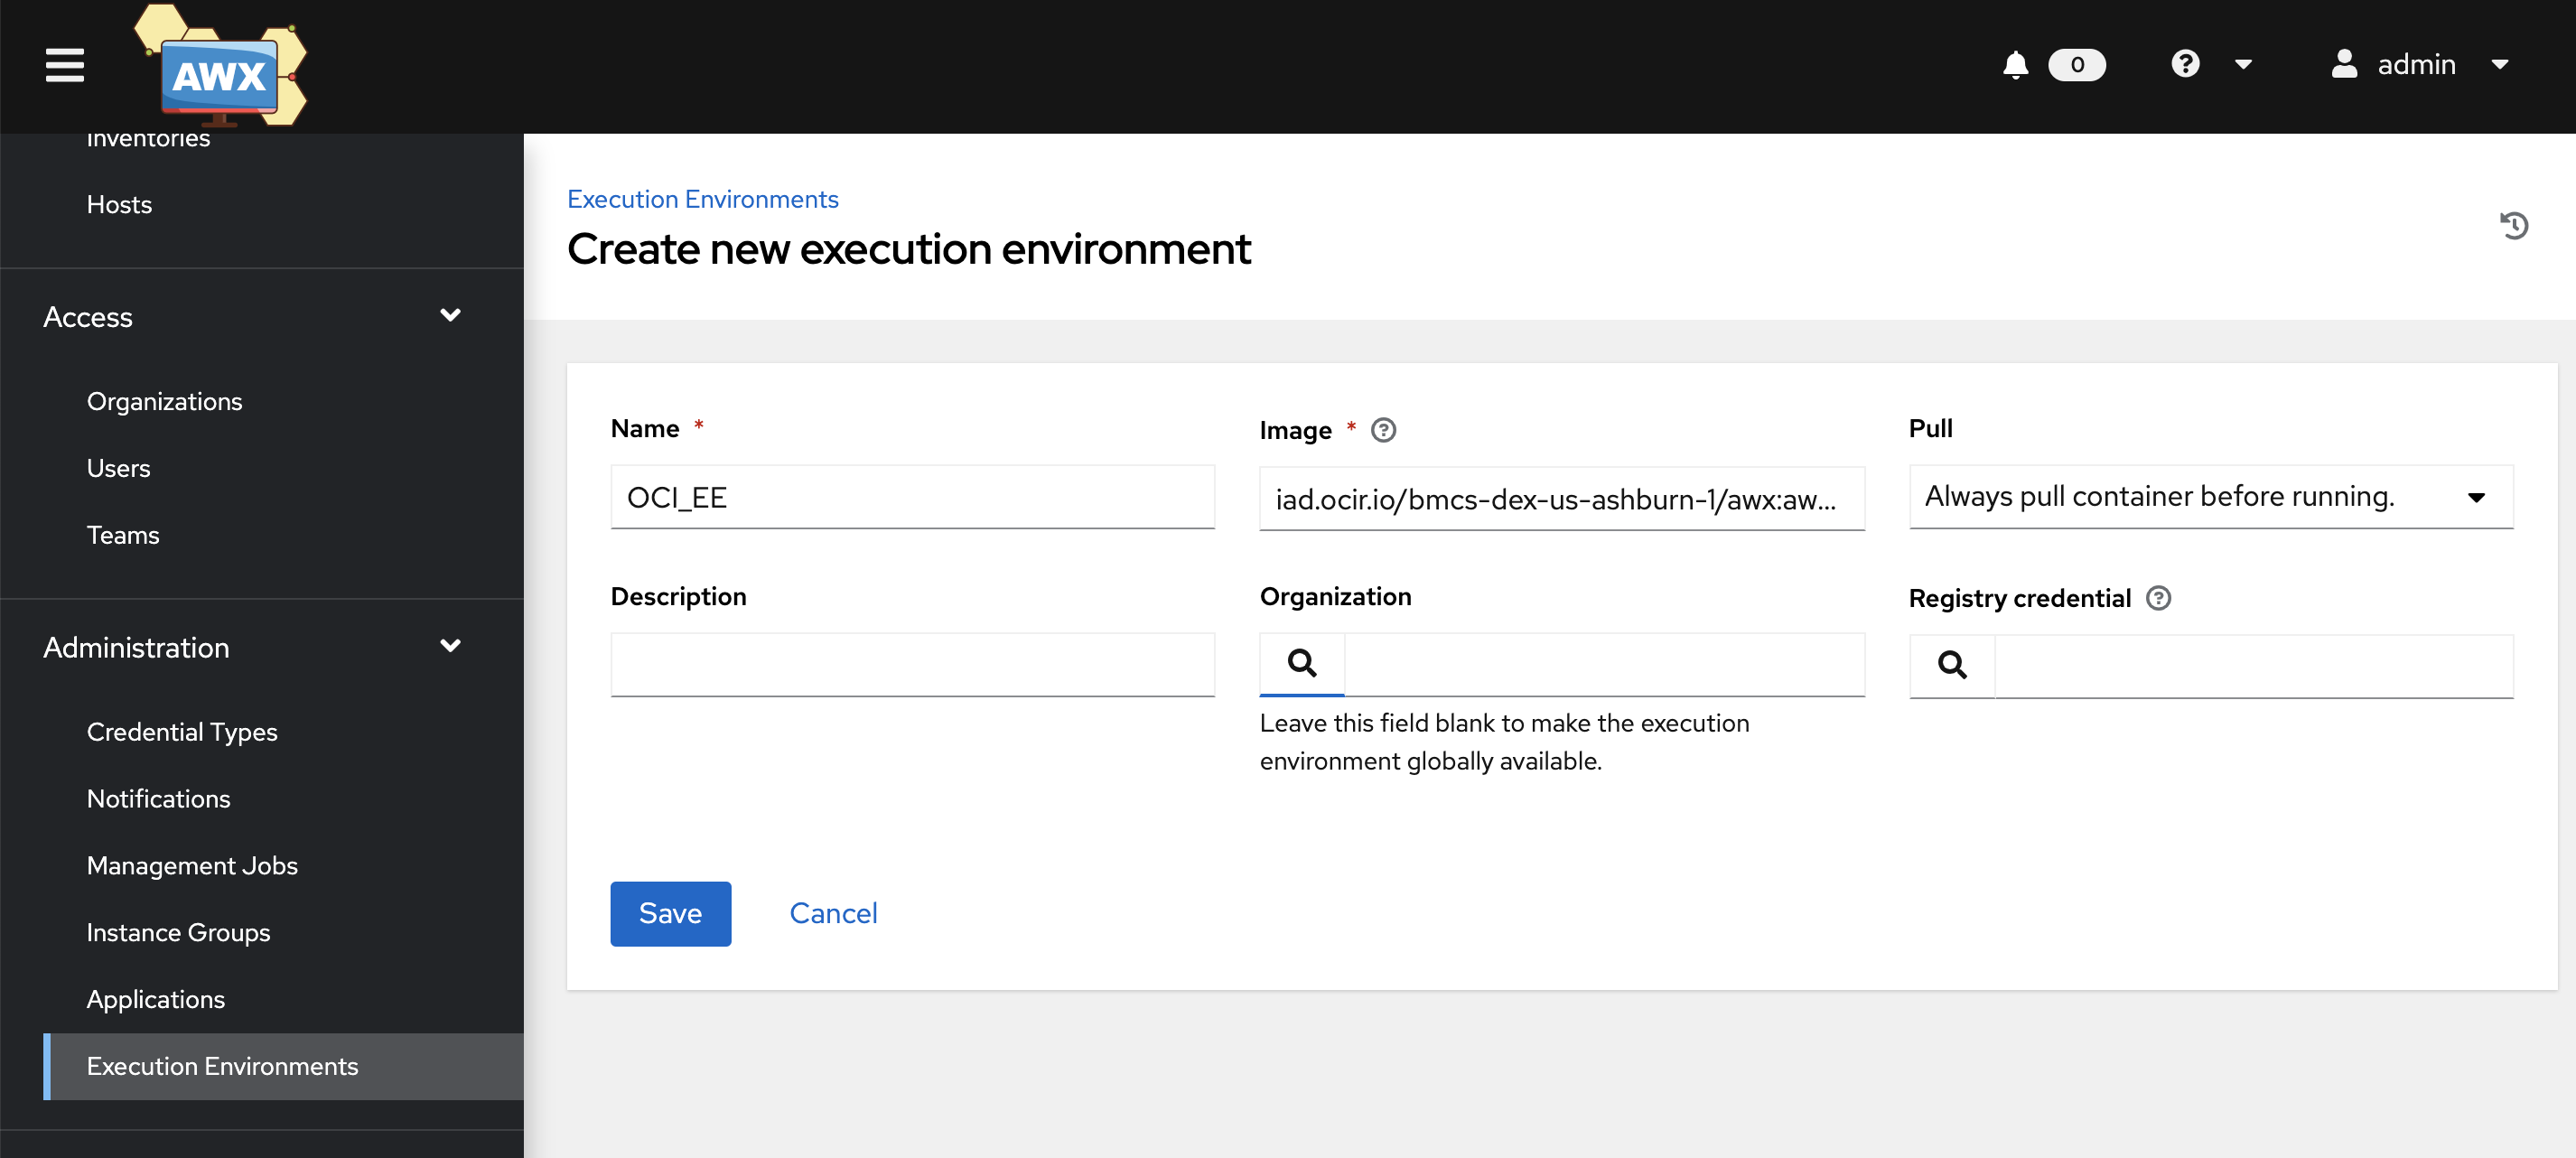
The OCI collection depends on the OCI Python SDK to run.
To install the SDK, we have created a docker image which installs the OCI Python SDK.
2)Add details for the execution environment details
Provide the images value iad.ocir.io/bmcs-dex-us-ashburn-1/awx:awxv19.2.2-latest
WARNING: THIS IMAGE IS NOT MAINTAINED AND MIGHT HAVE SECURITY ISSUES
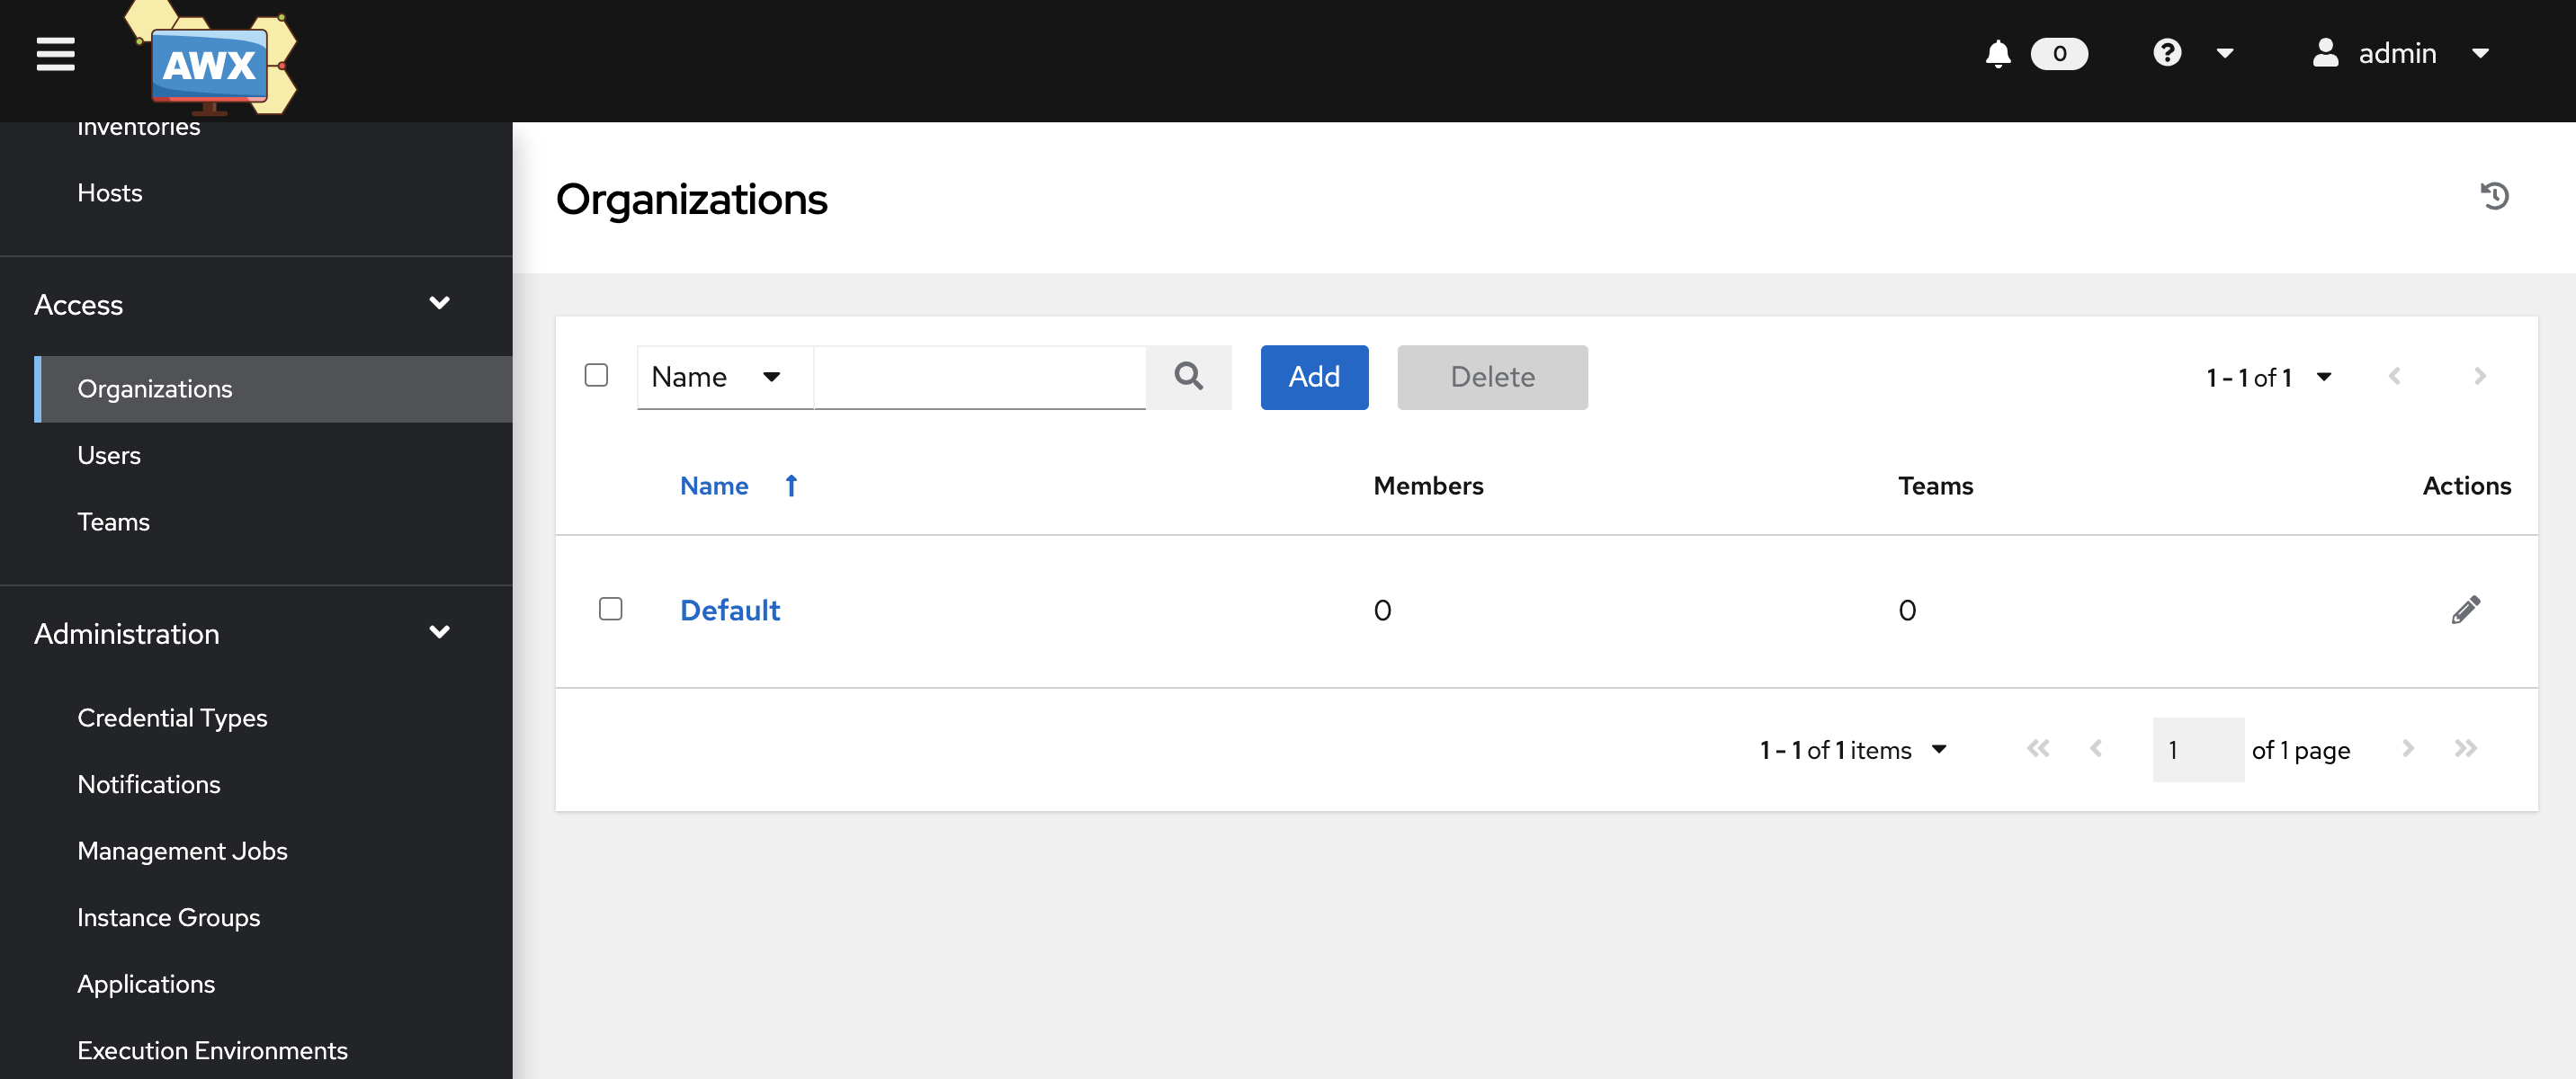
3)Add organization
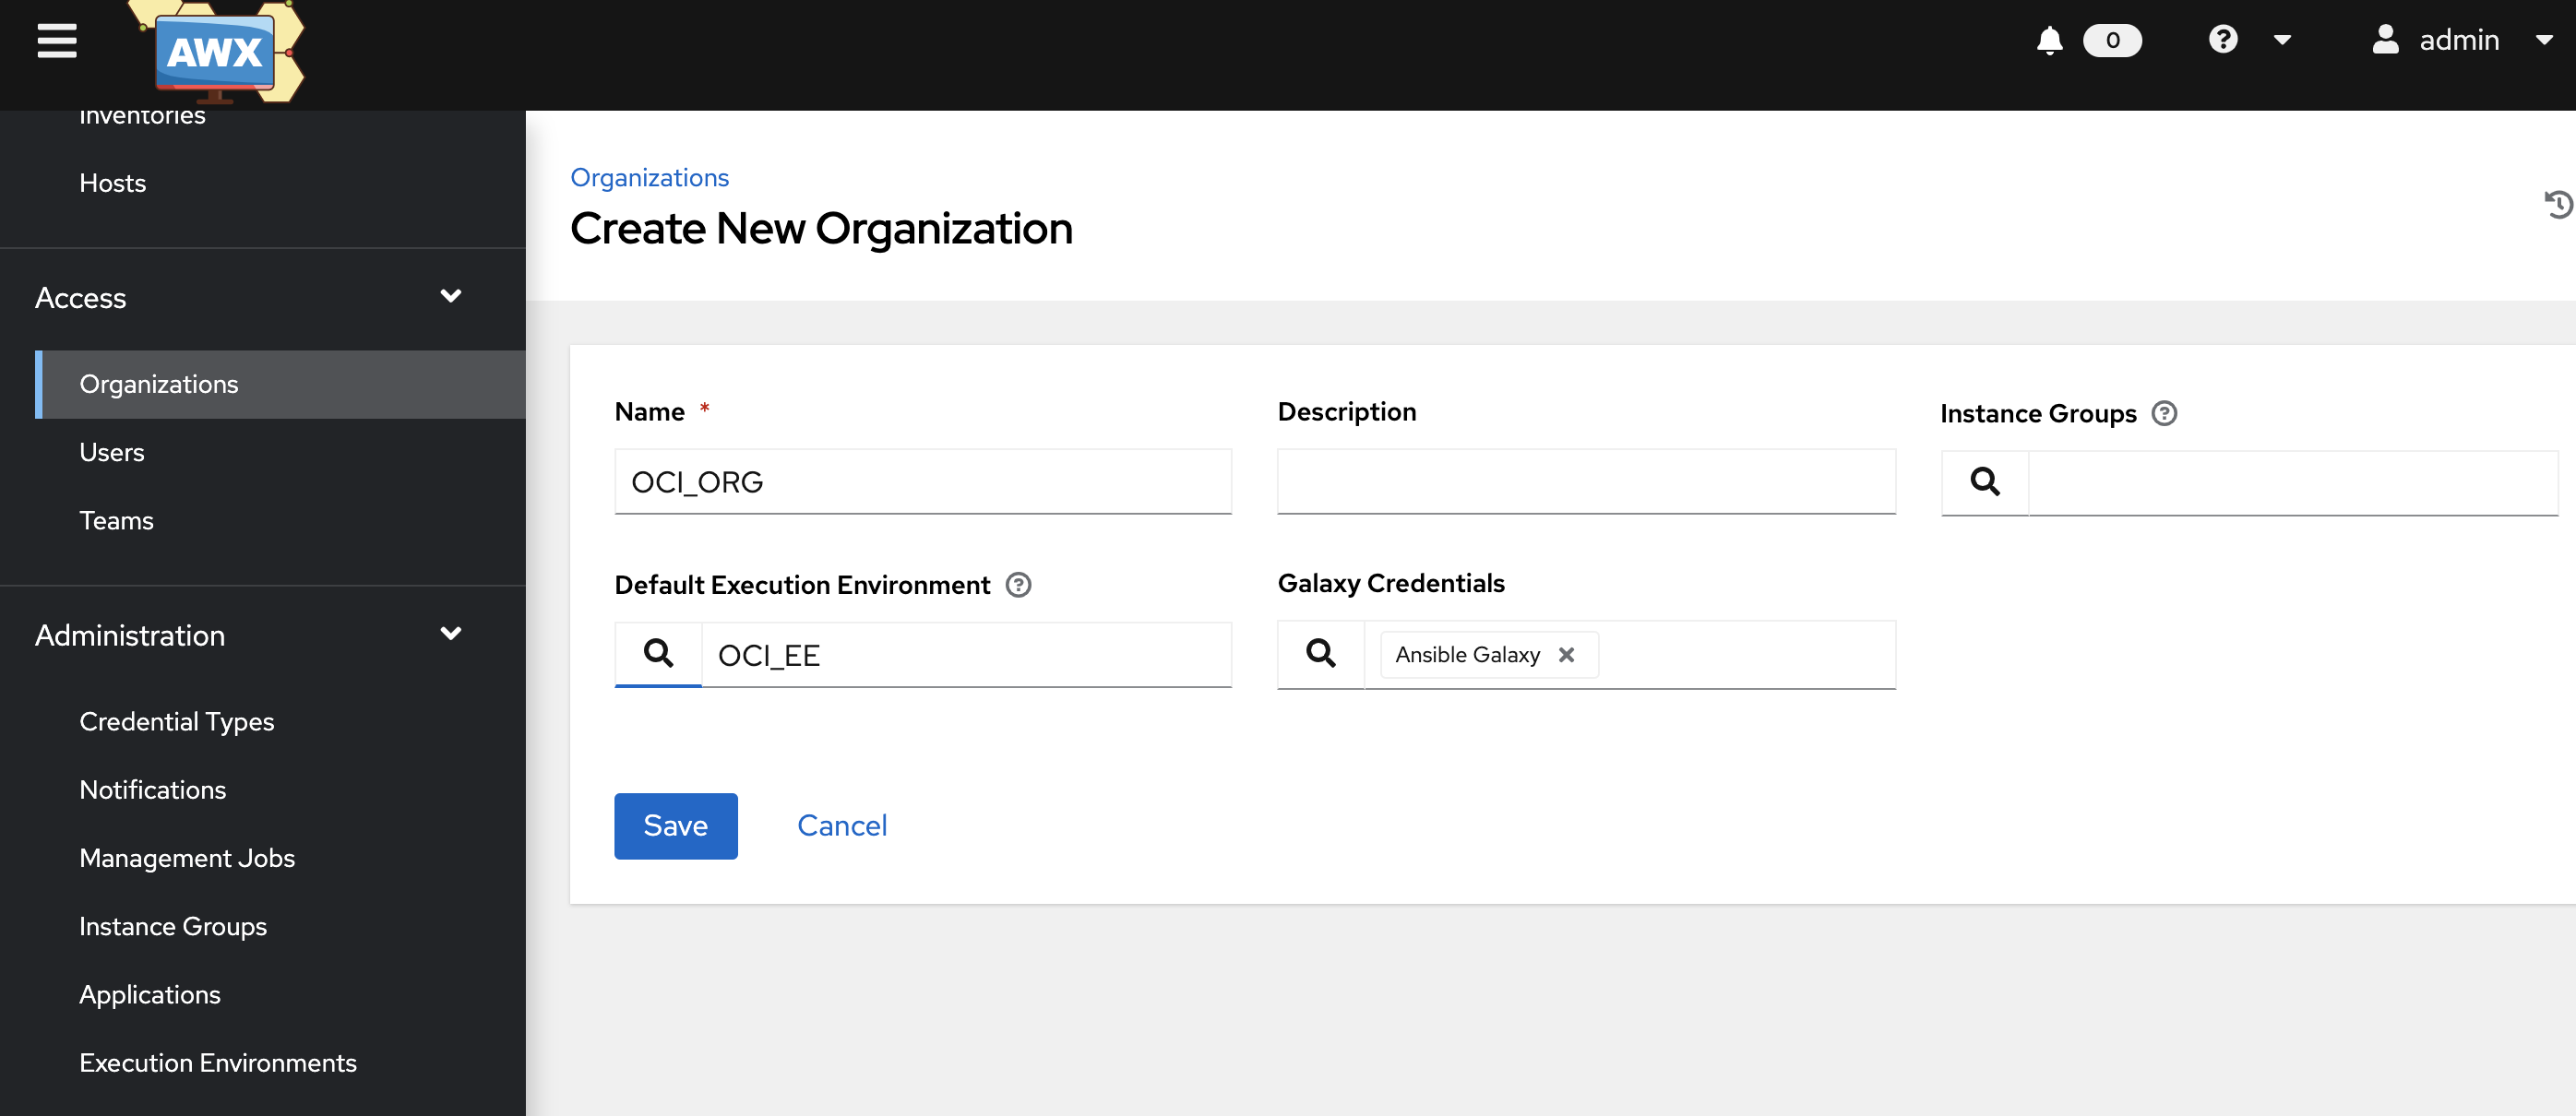
4)Add details for the Organization
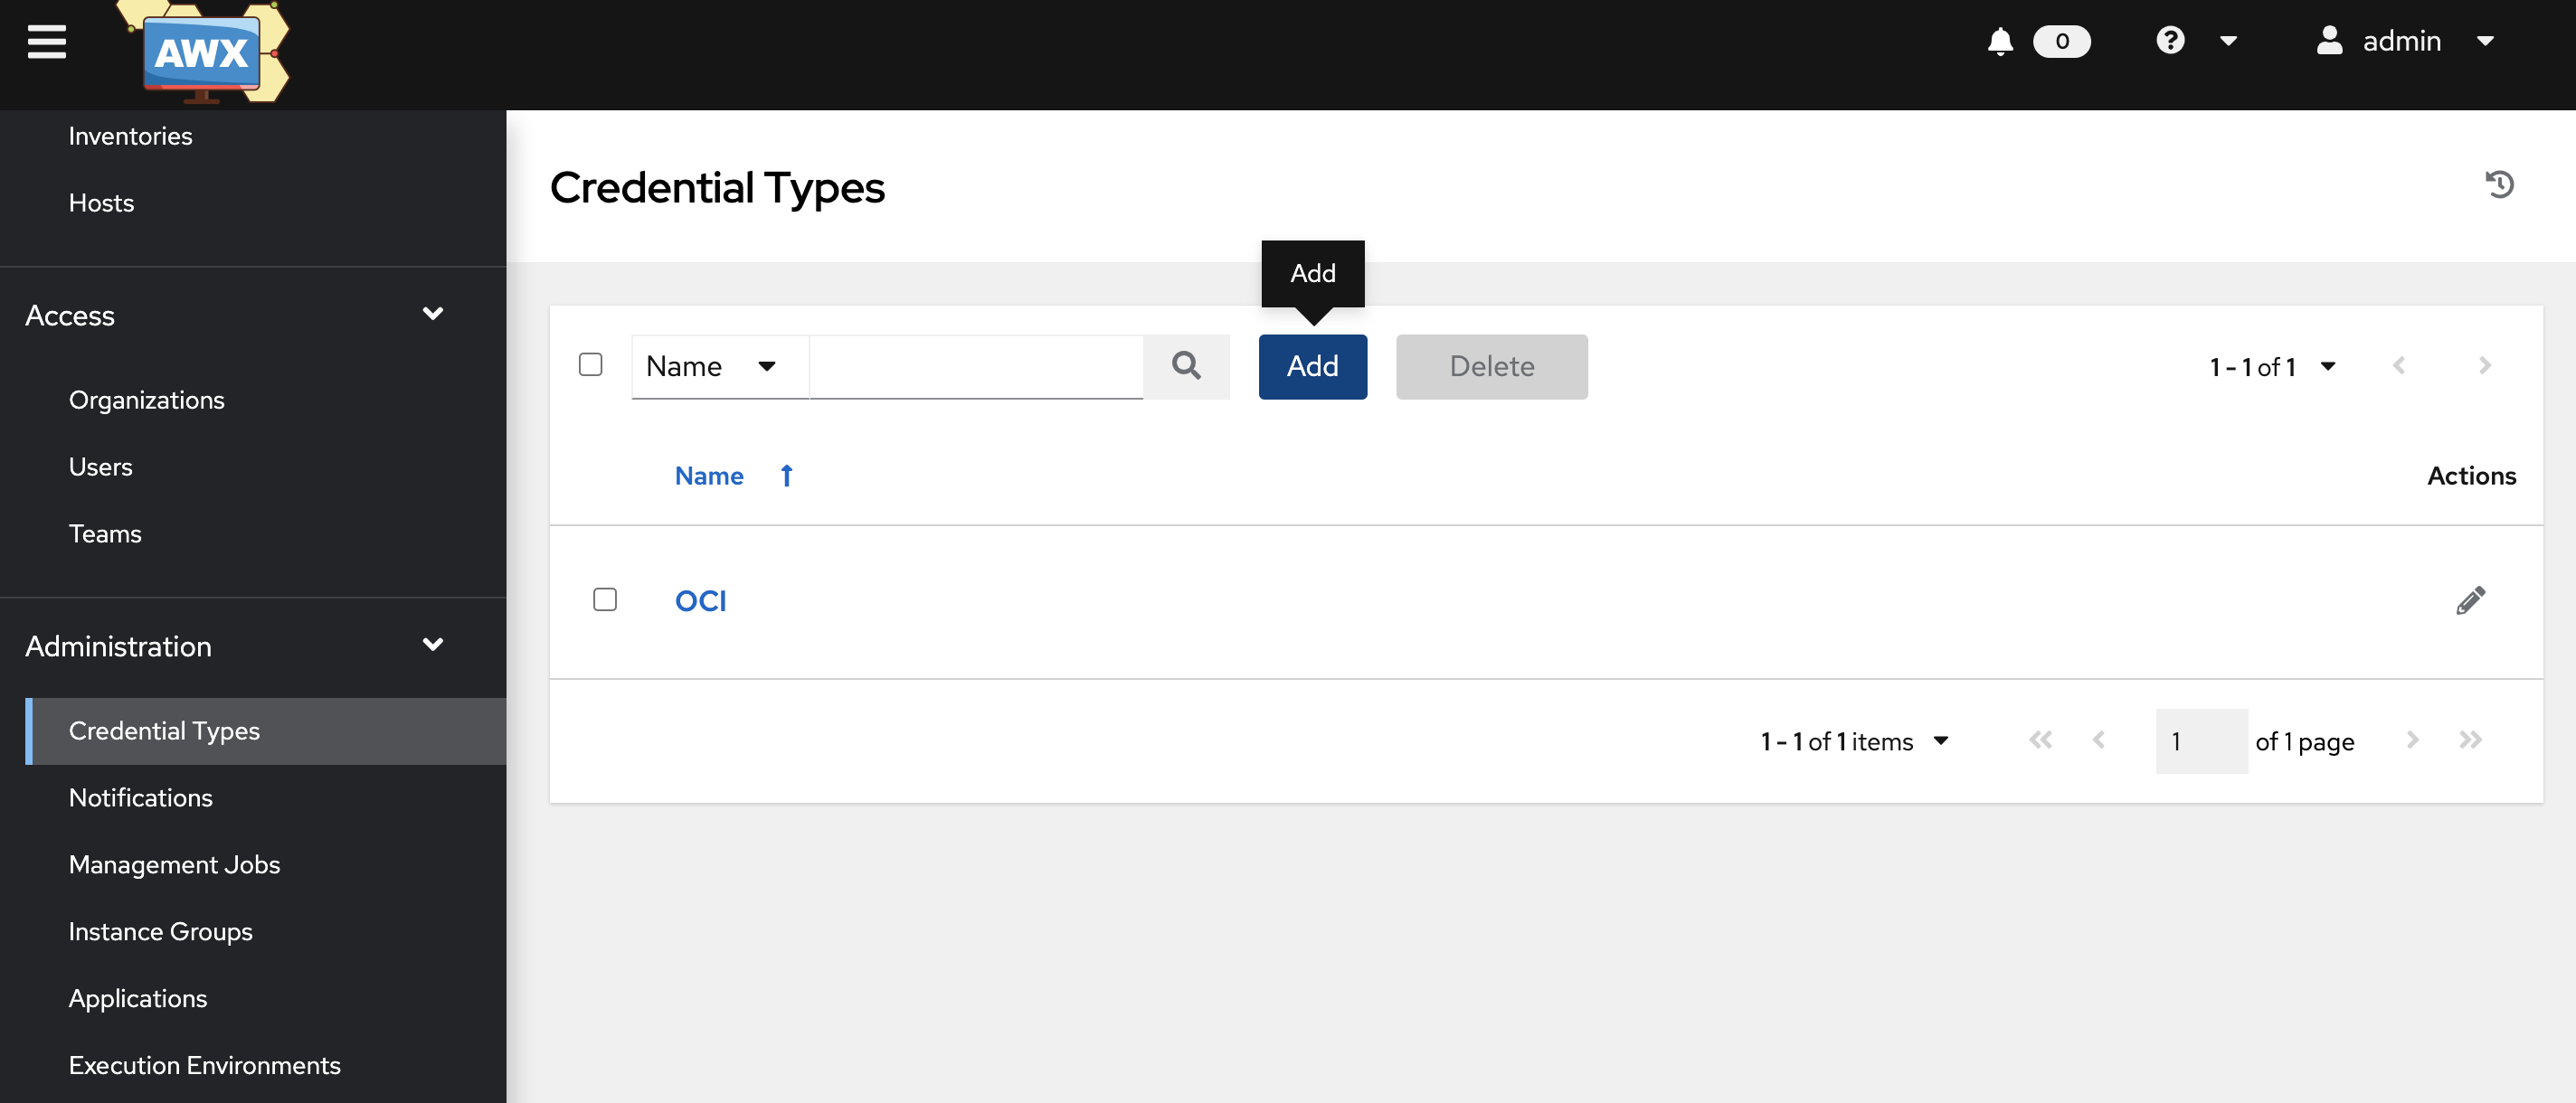
5)Add credential type
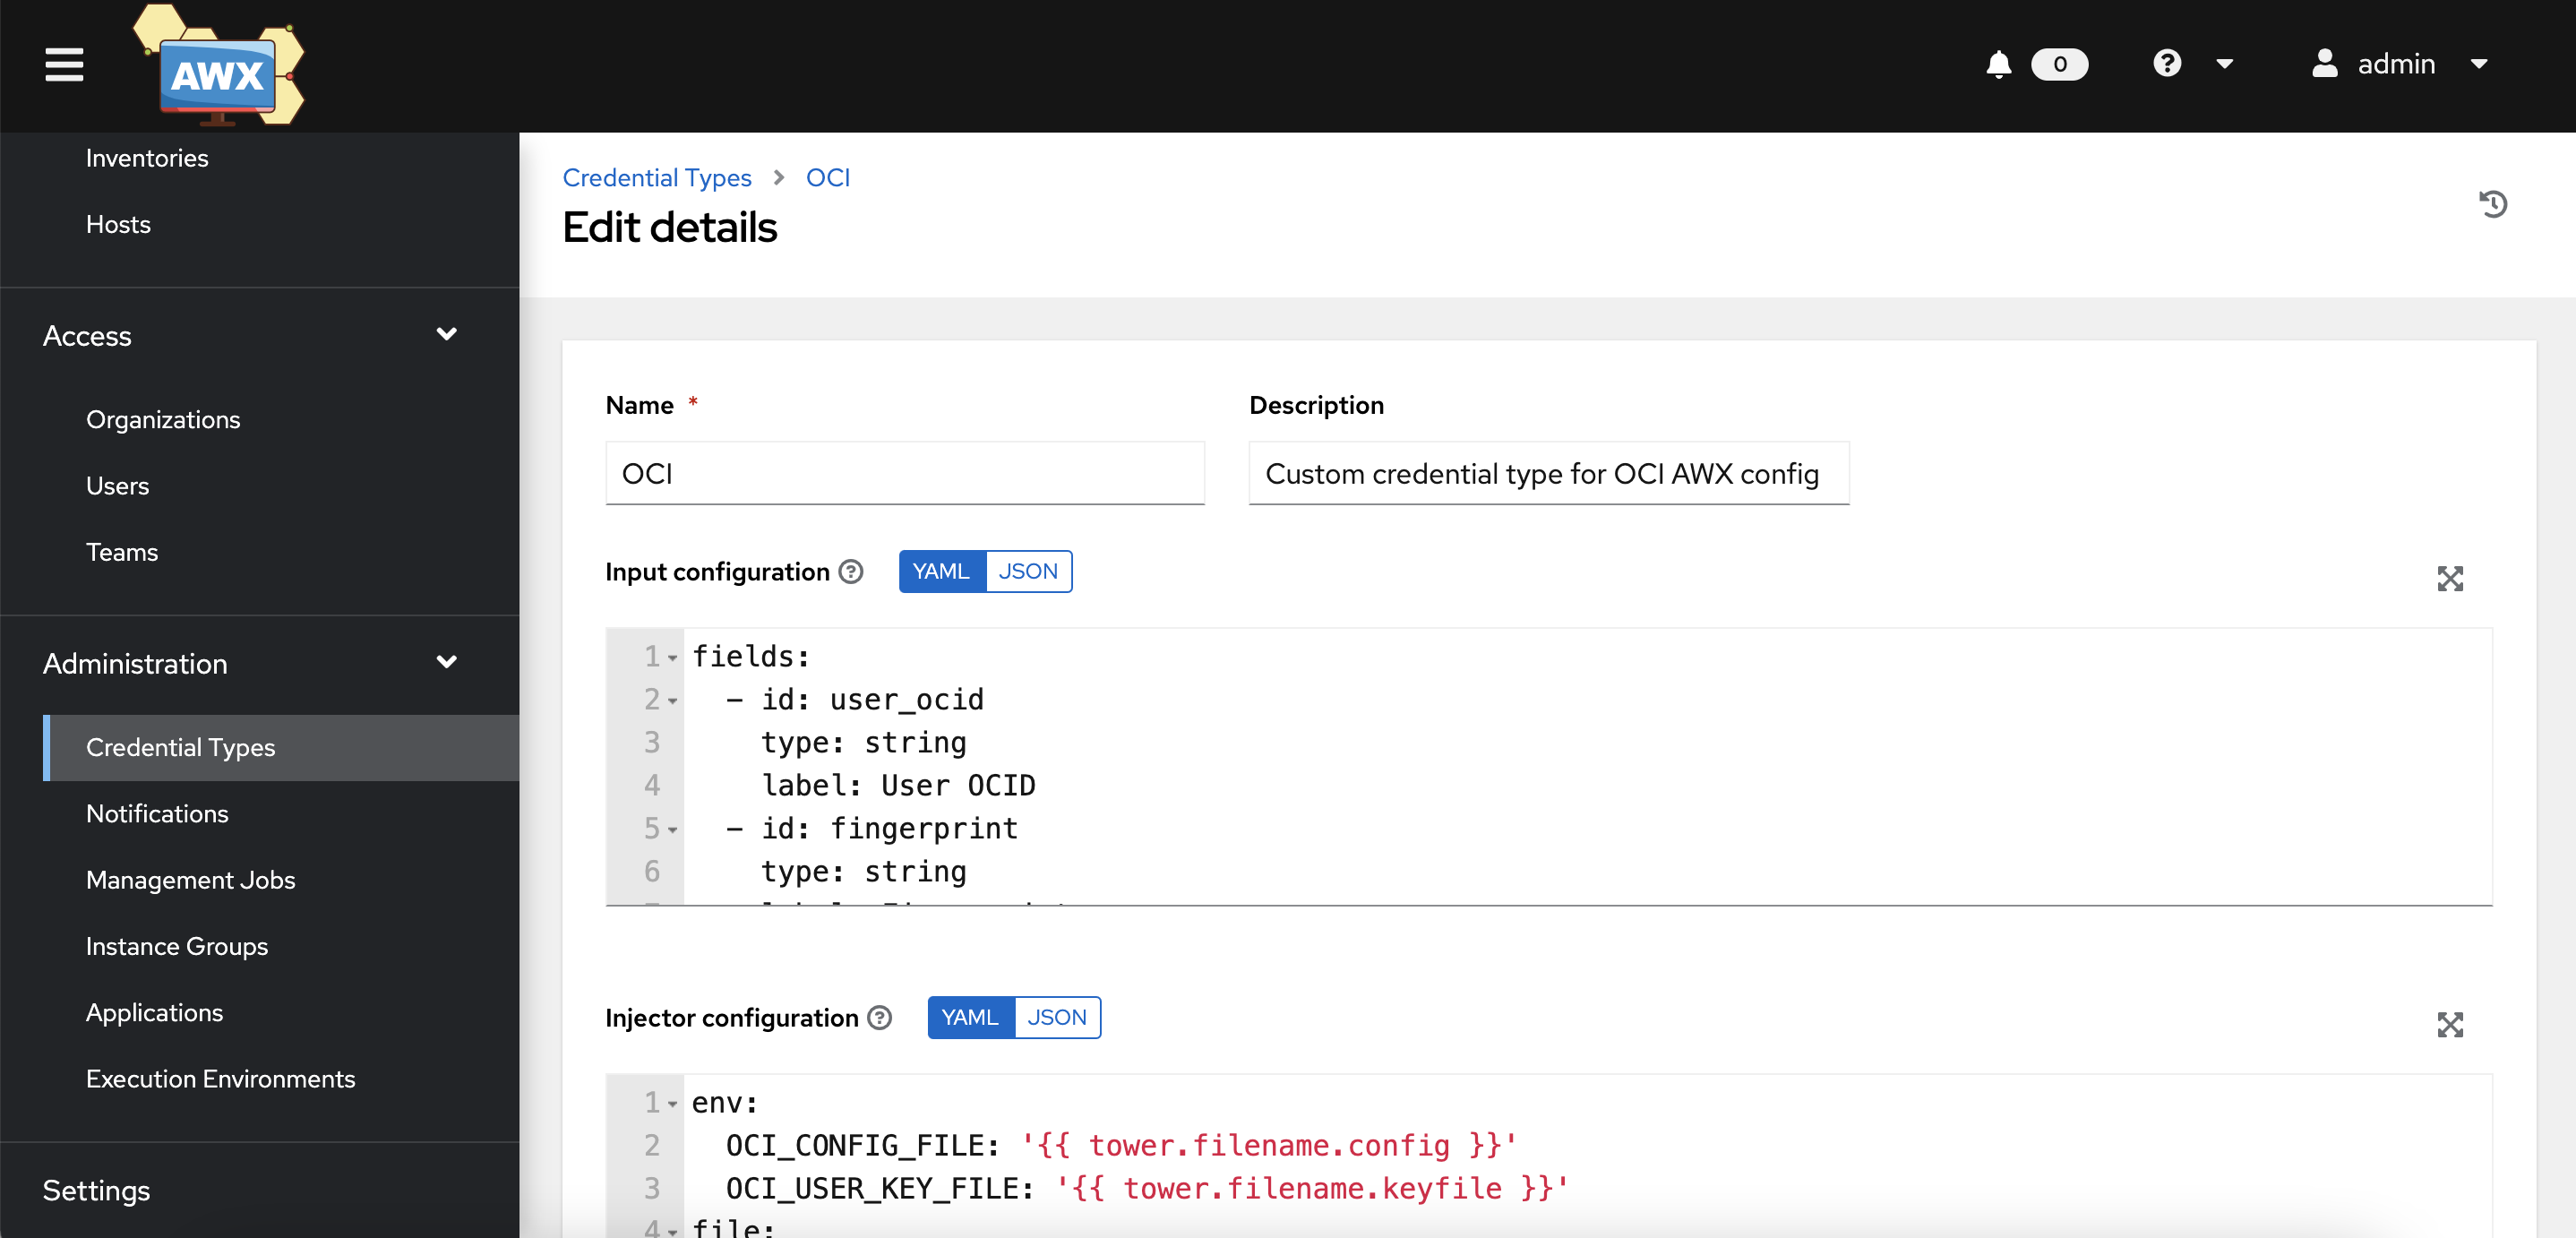
6)Provide credential type values
Input Configuration:
fields:
  - id: user_ocid
    type: string
    label: User OCID
  - id: fingerprint
    type: string
    label: Fingerprint
  - id: tenant_ocid
    type: string
    label: Tenant OCID
  - id: region
    type: string
    label: Region
  - id: private_user_key
    type: string
    label: Private User Key
    secret: true
    multiline: true
required:
  - user_ocid
  - tenant_ocid
  - region
  - fingerprint
  - private_user_key
Injector Configuration:
env:
  OCI_CONFIG_FILE: '{{ tower.filename.config }}'
  OCI_USER_KEY_FILE: '{{ tower.filename.keyfile }}'
file:
  template.config: |-
    [DEFAULT]
    user={{ user_ocid }}
    fingerprint={{ fingerprint }}
    tenancy={{ tenant_ocid }}
    region={{ region }}
  template.keyfile: '{{ private_user_key }}'
7)Create Git repo and add the playbooks. Follow below folder structure
├── collections
│   └── requirements.yml
└── inventory.oci.yml
The inventory.oci.yml file contains the following details for the inventory plugin:
$ cat inventory.oci.yml
plugin: oracle.oci.oci
regions: all
fetch_db_hosts: true
Create a requirements file at collections or requirements.yml that looks like the following string:
$ cat collections/requirements.yml
collections:
  - name: oracle.oci
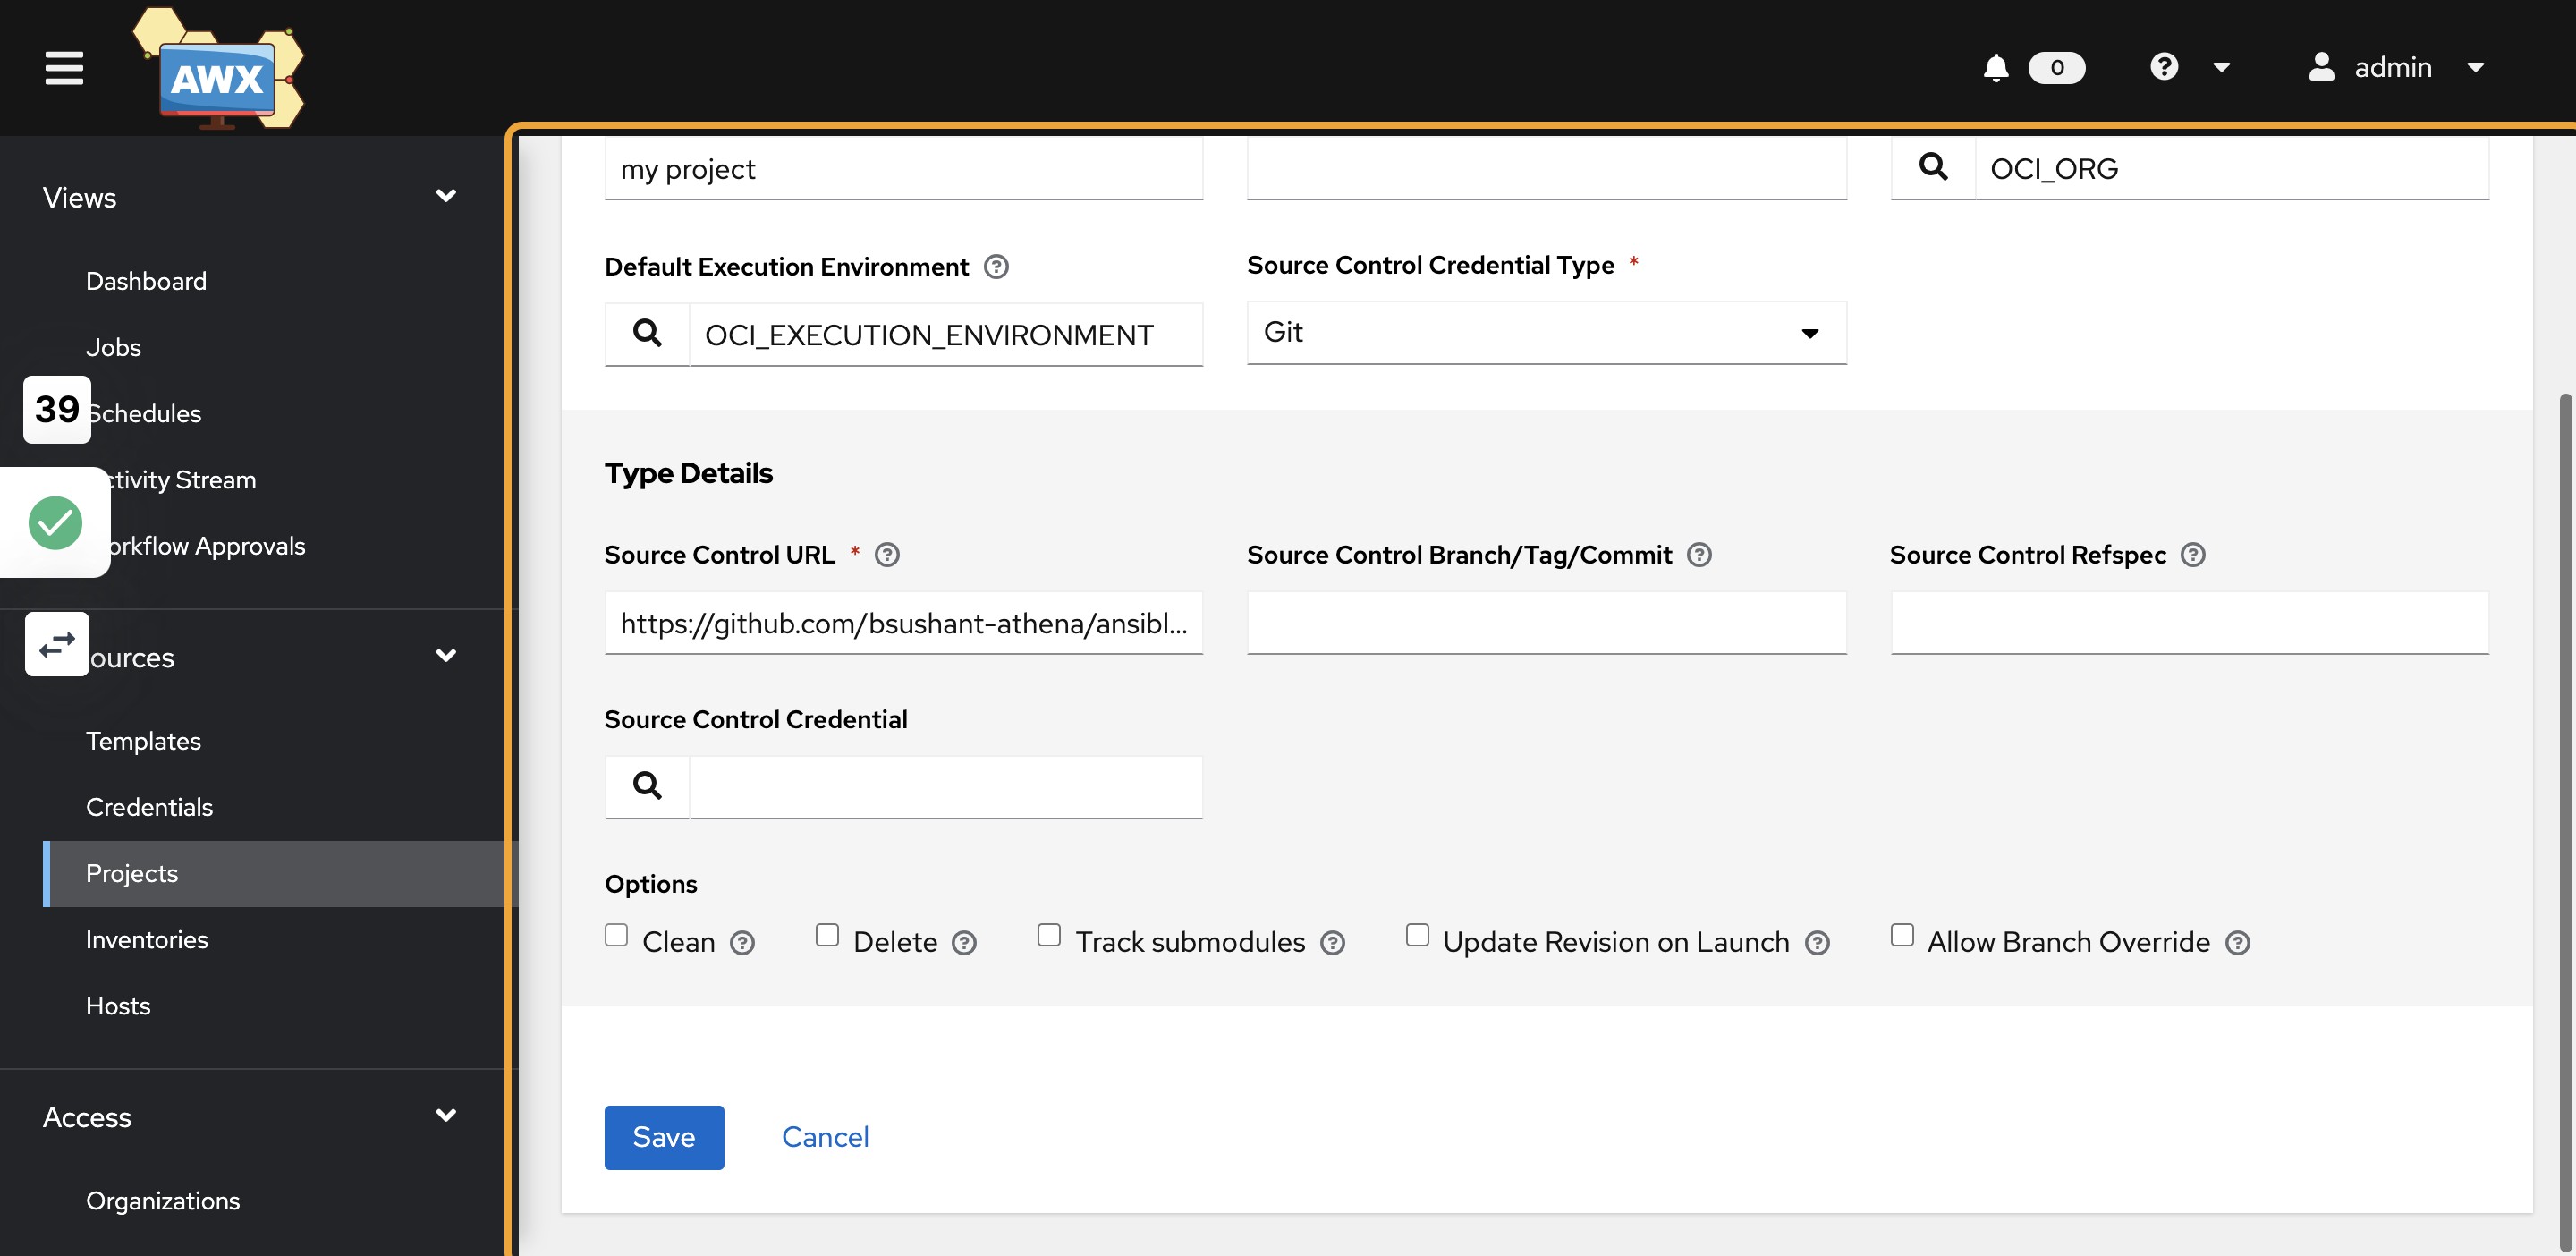
8)Add Project and provide the details
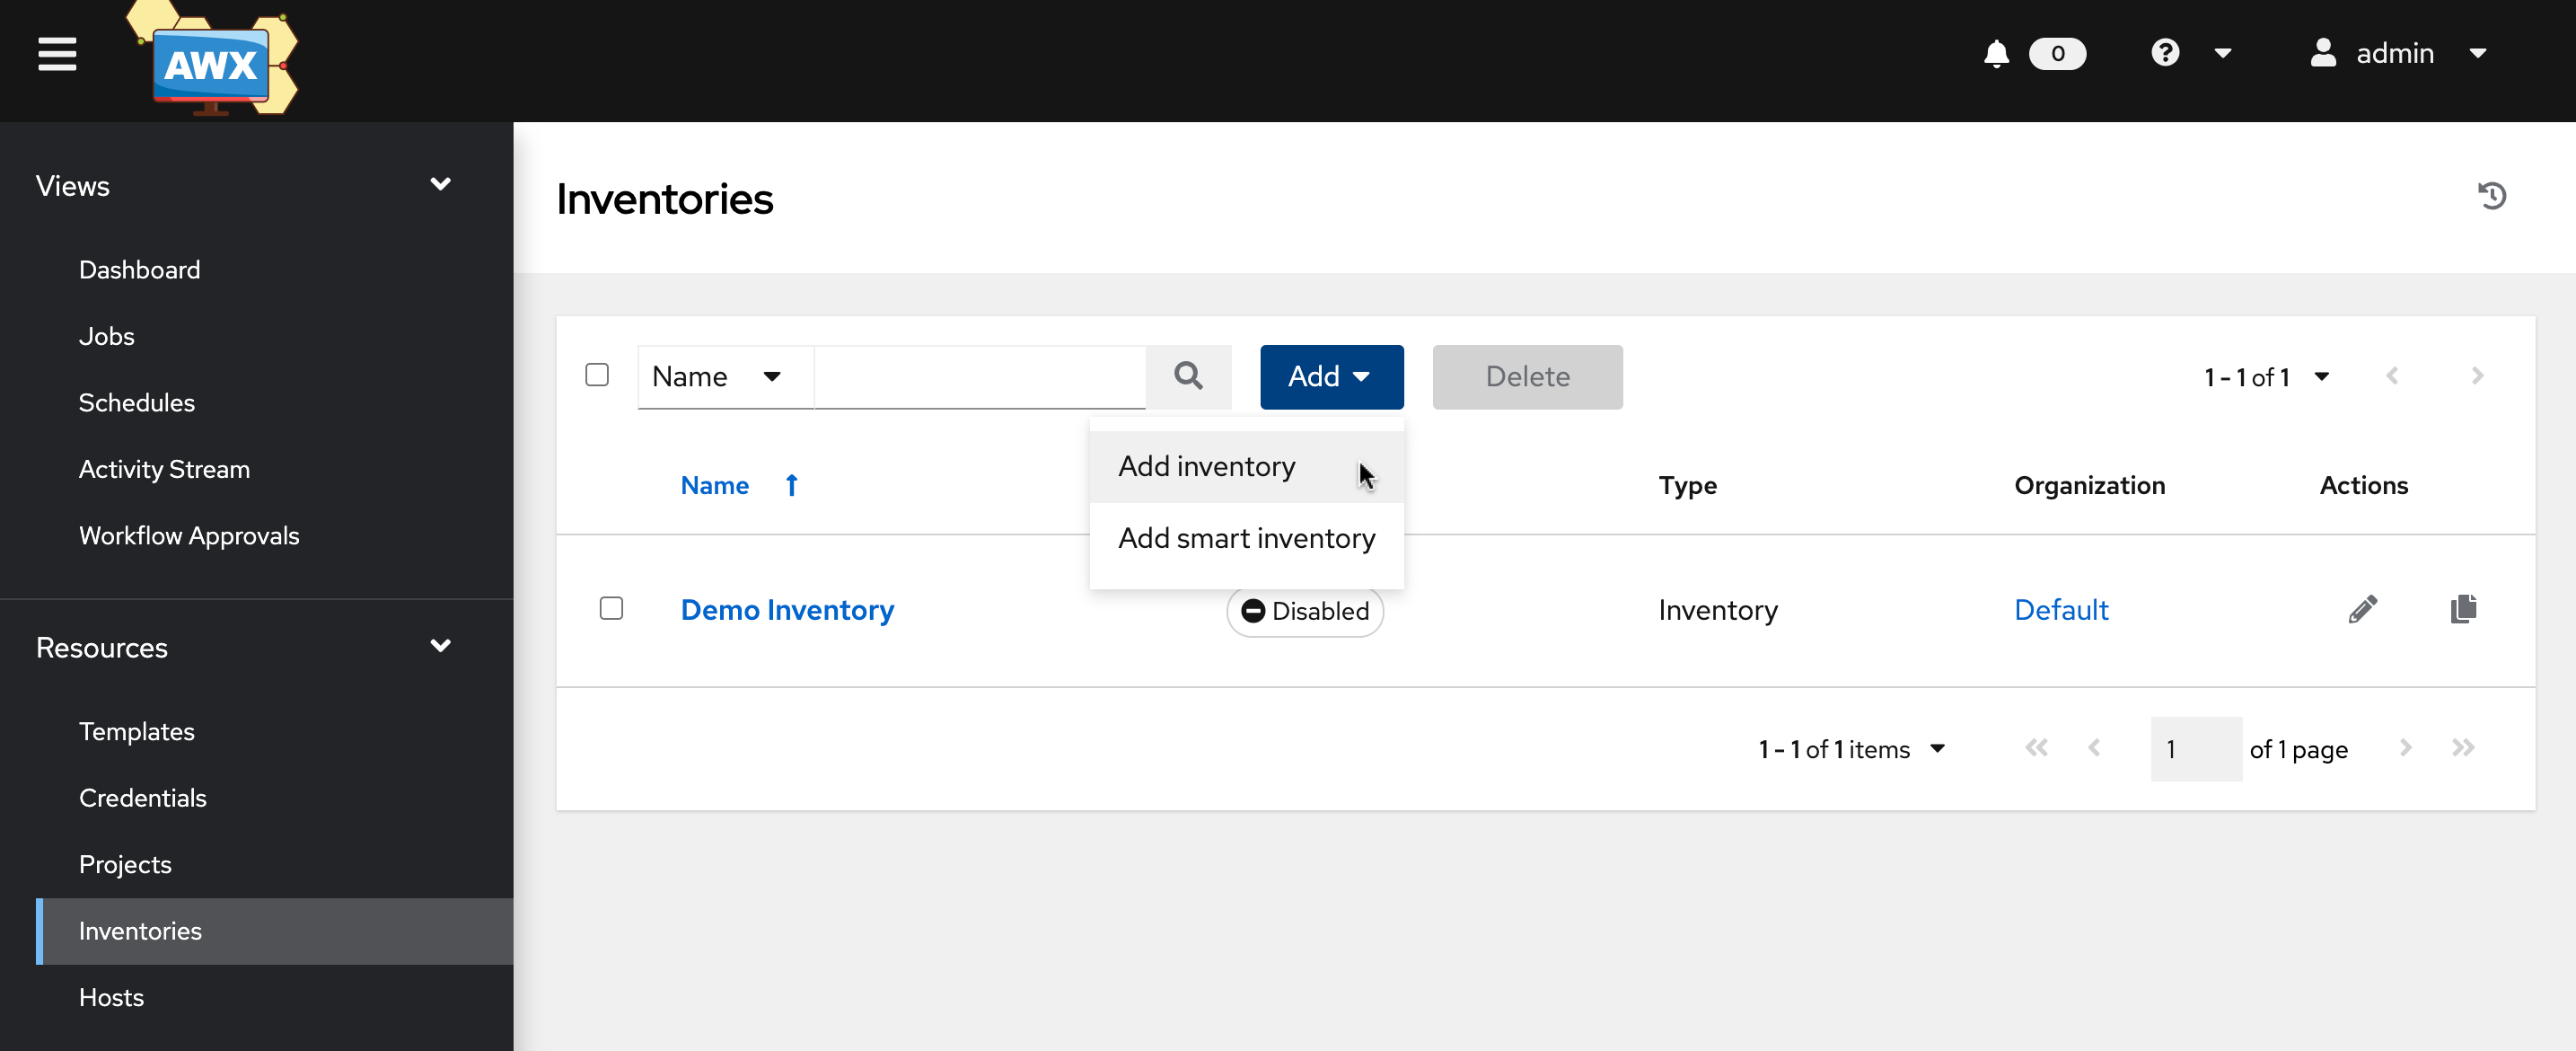
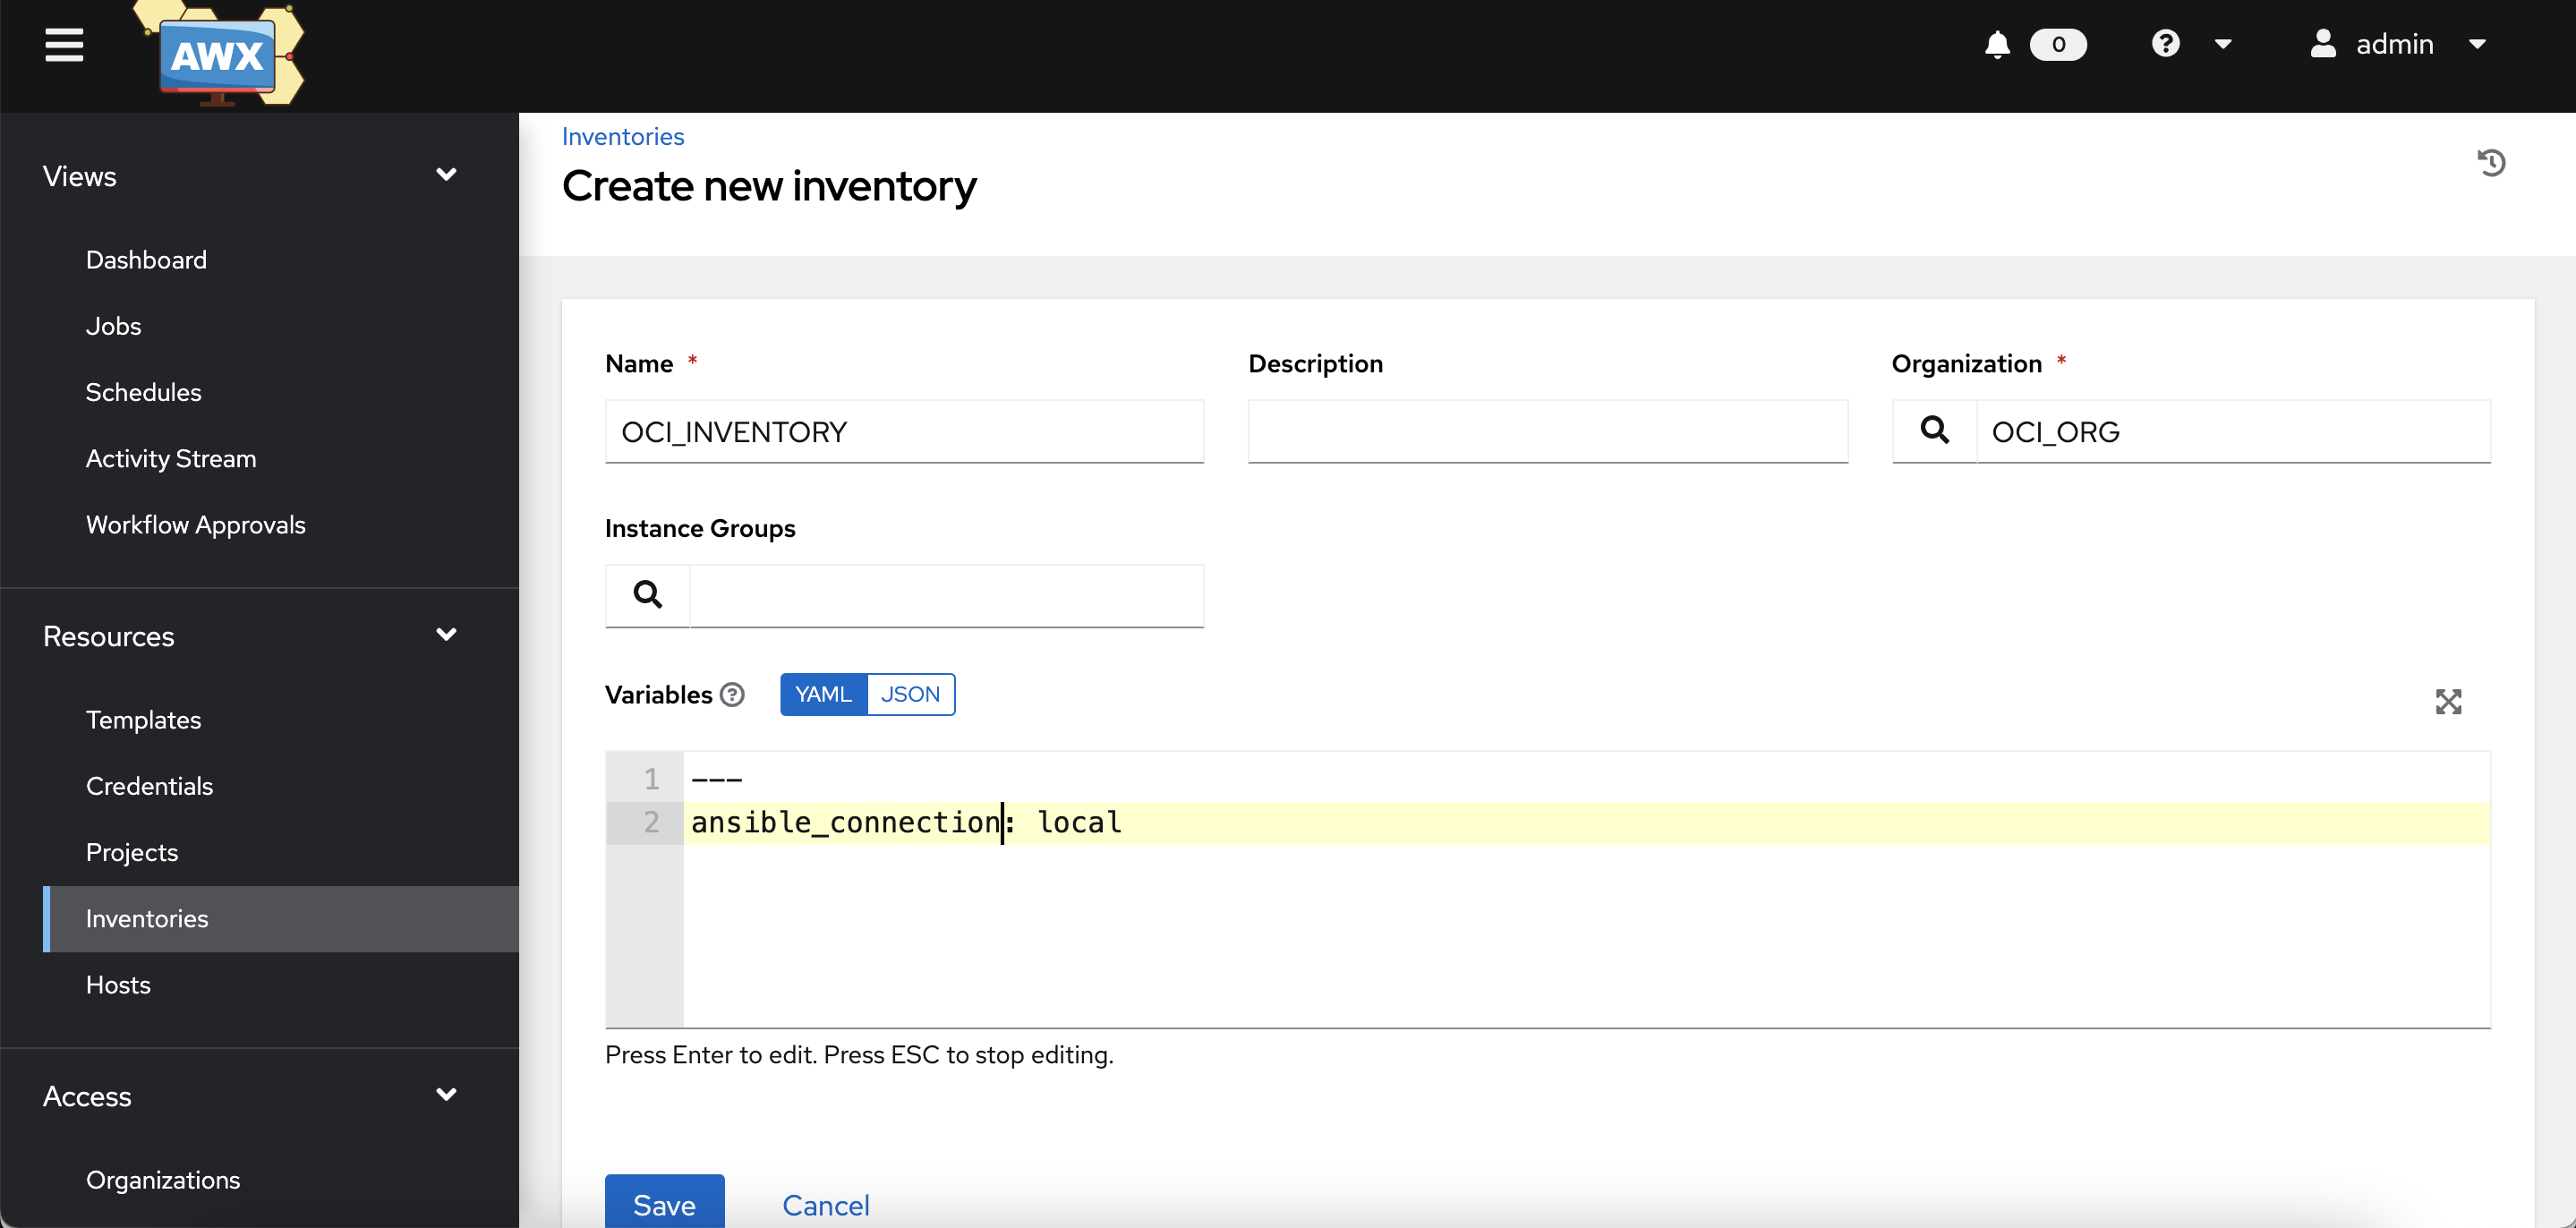
9)Add Inventory
10)Provide Inventory details
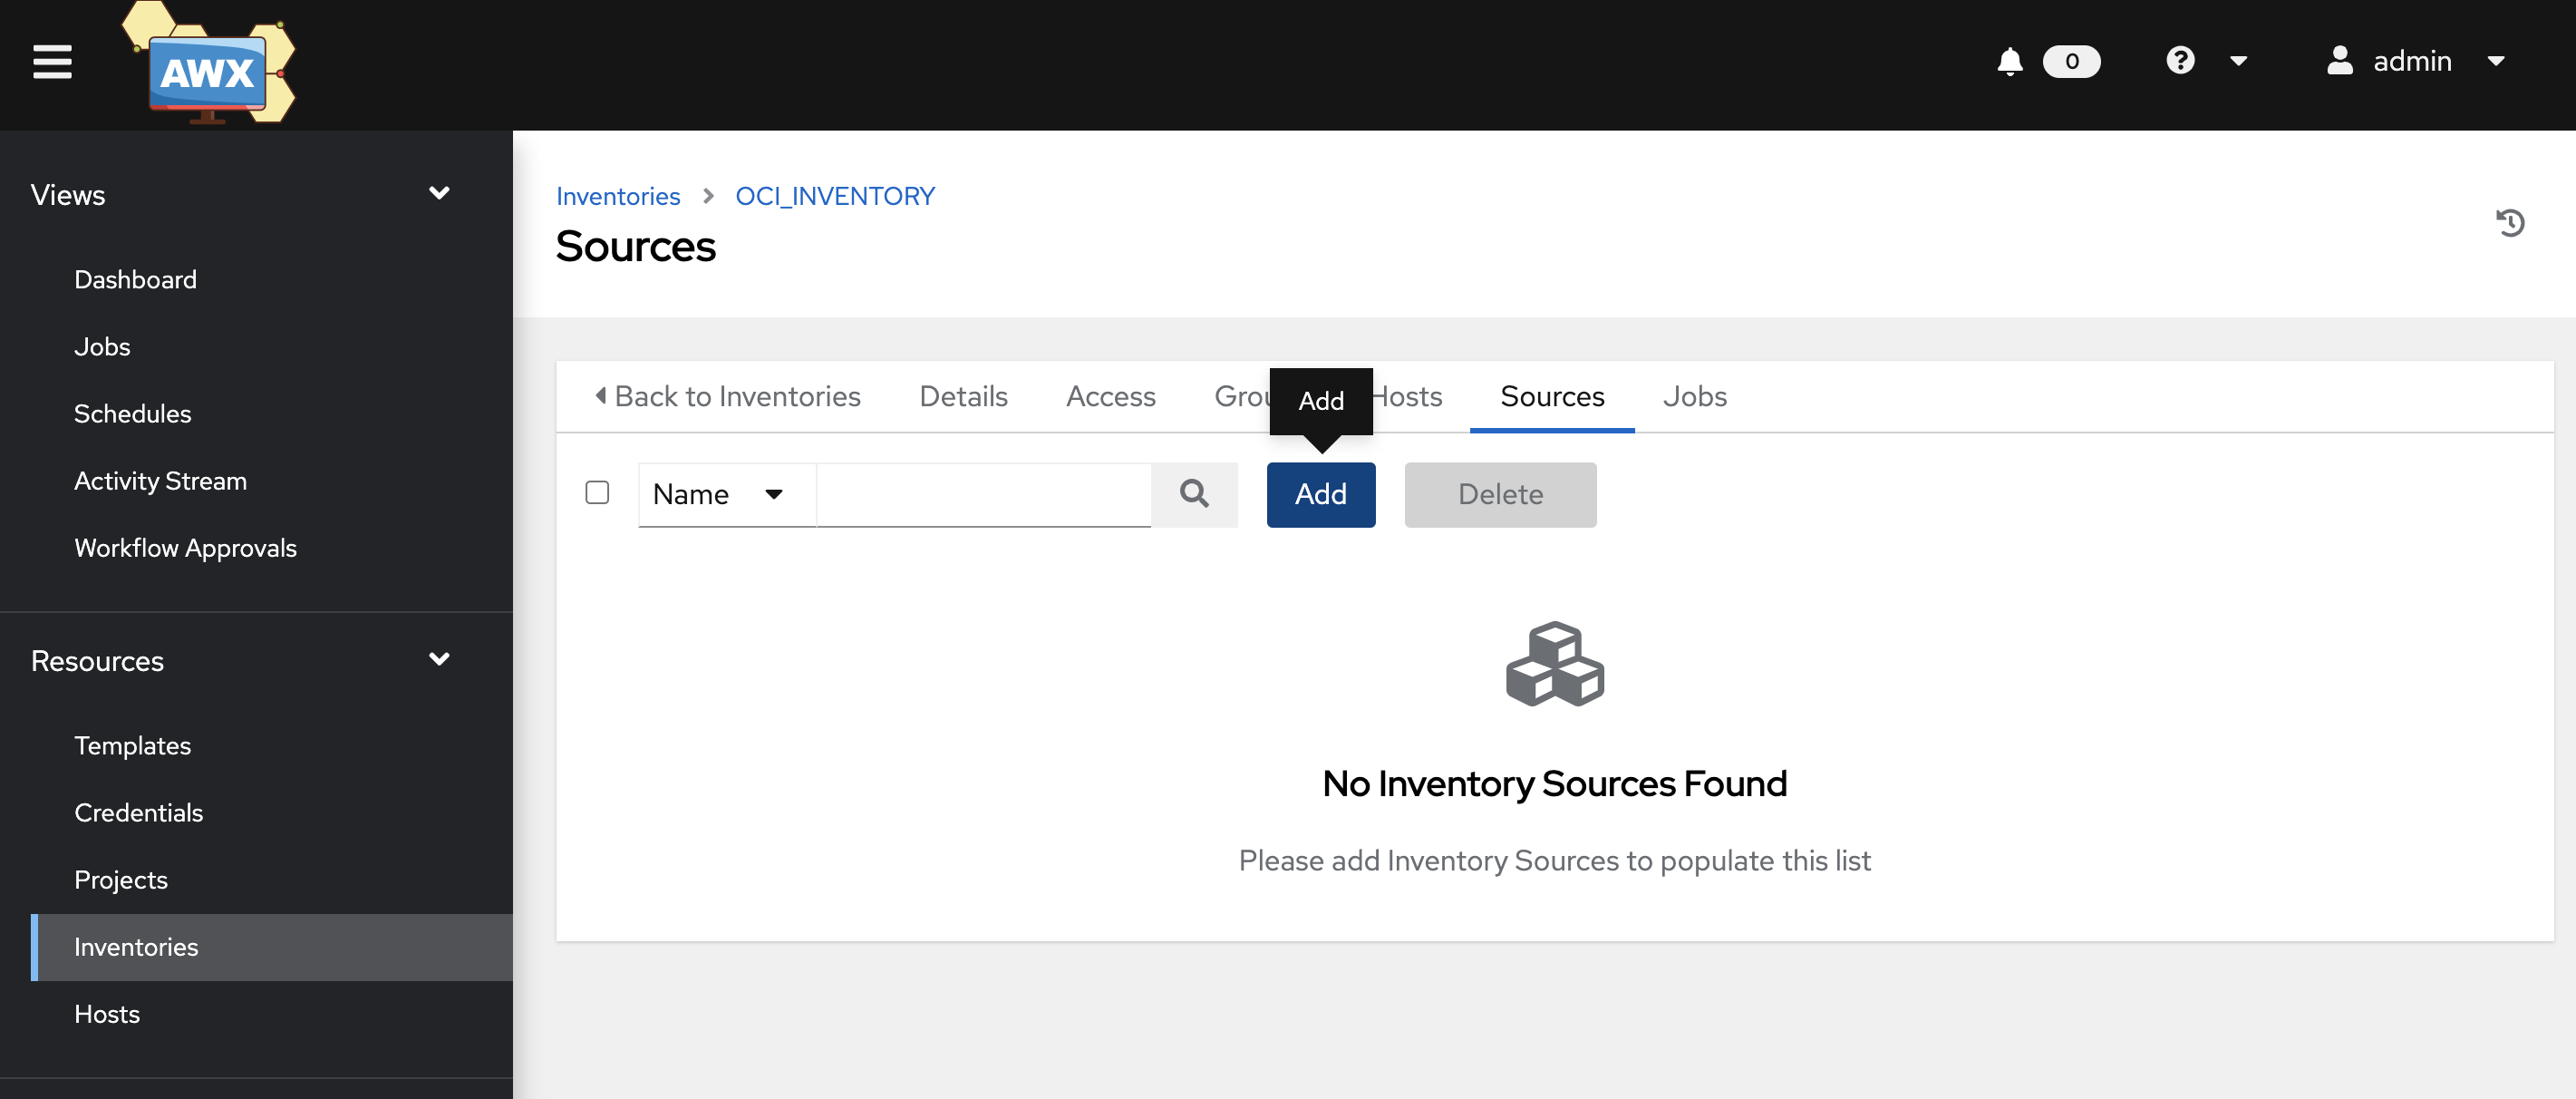
11)Add Inventory source
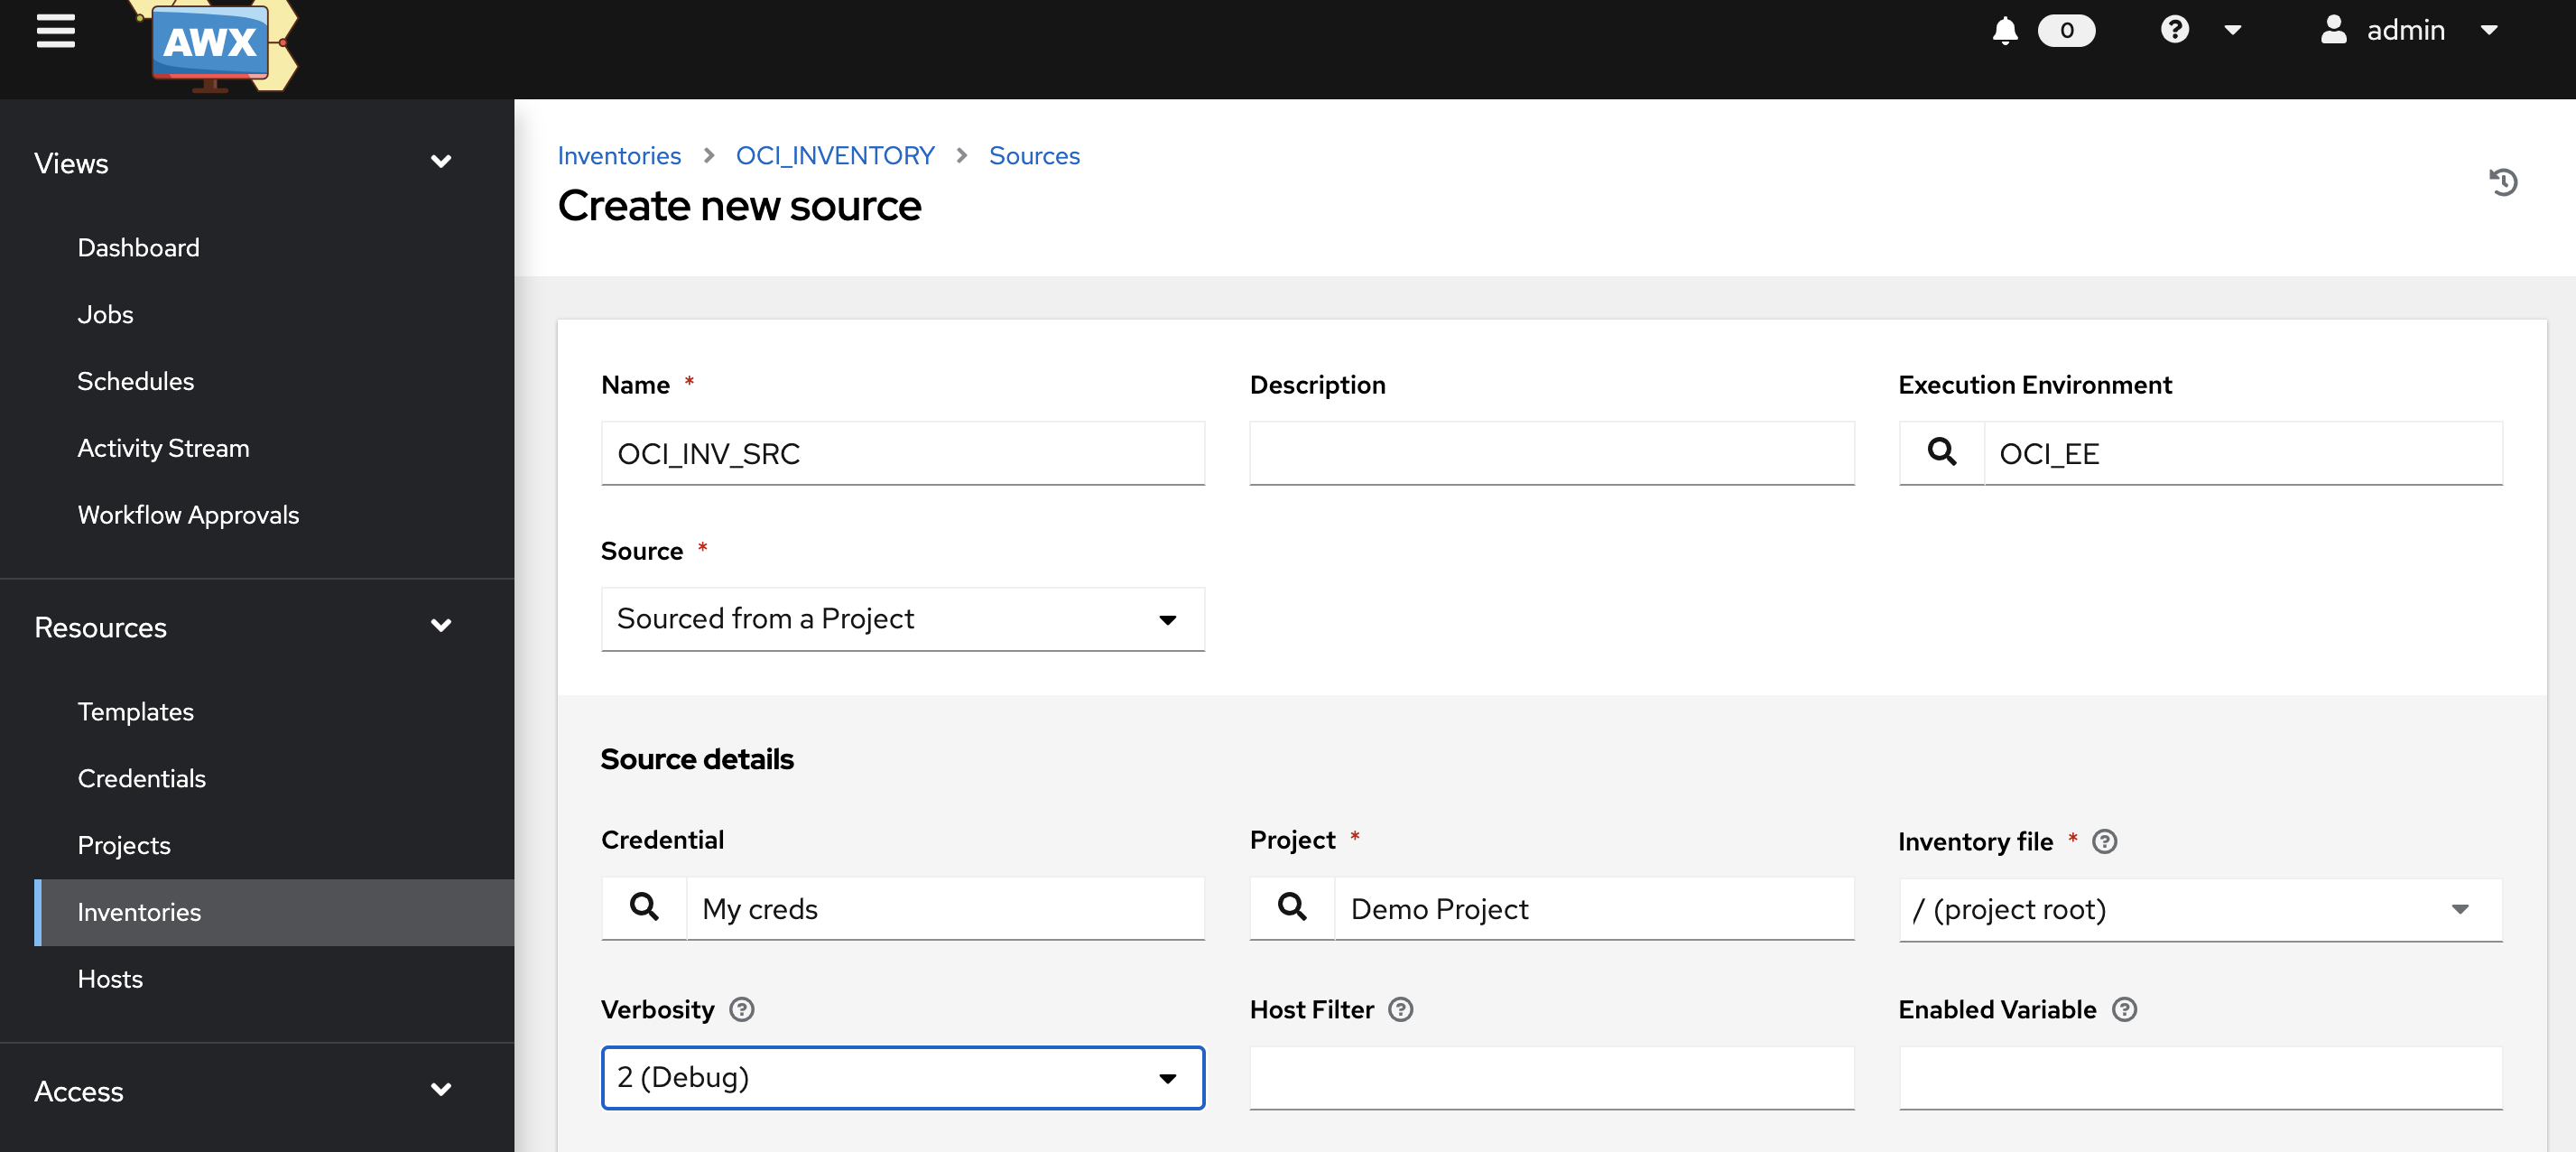
12)Add Inventory source details by providing proper values which you created in previous steps
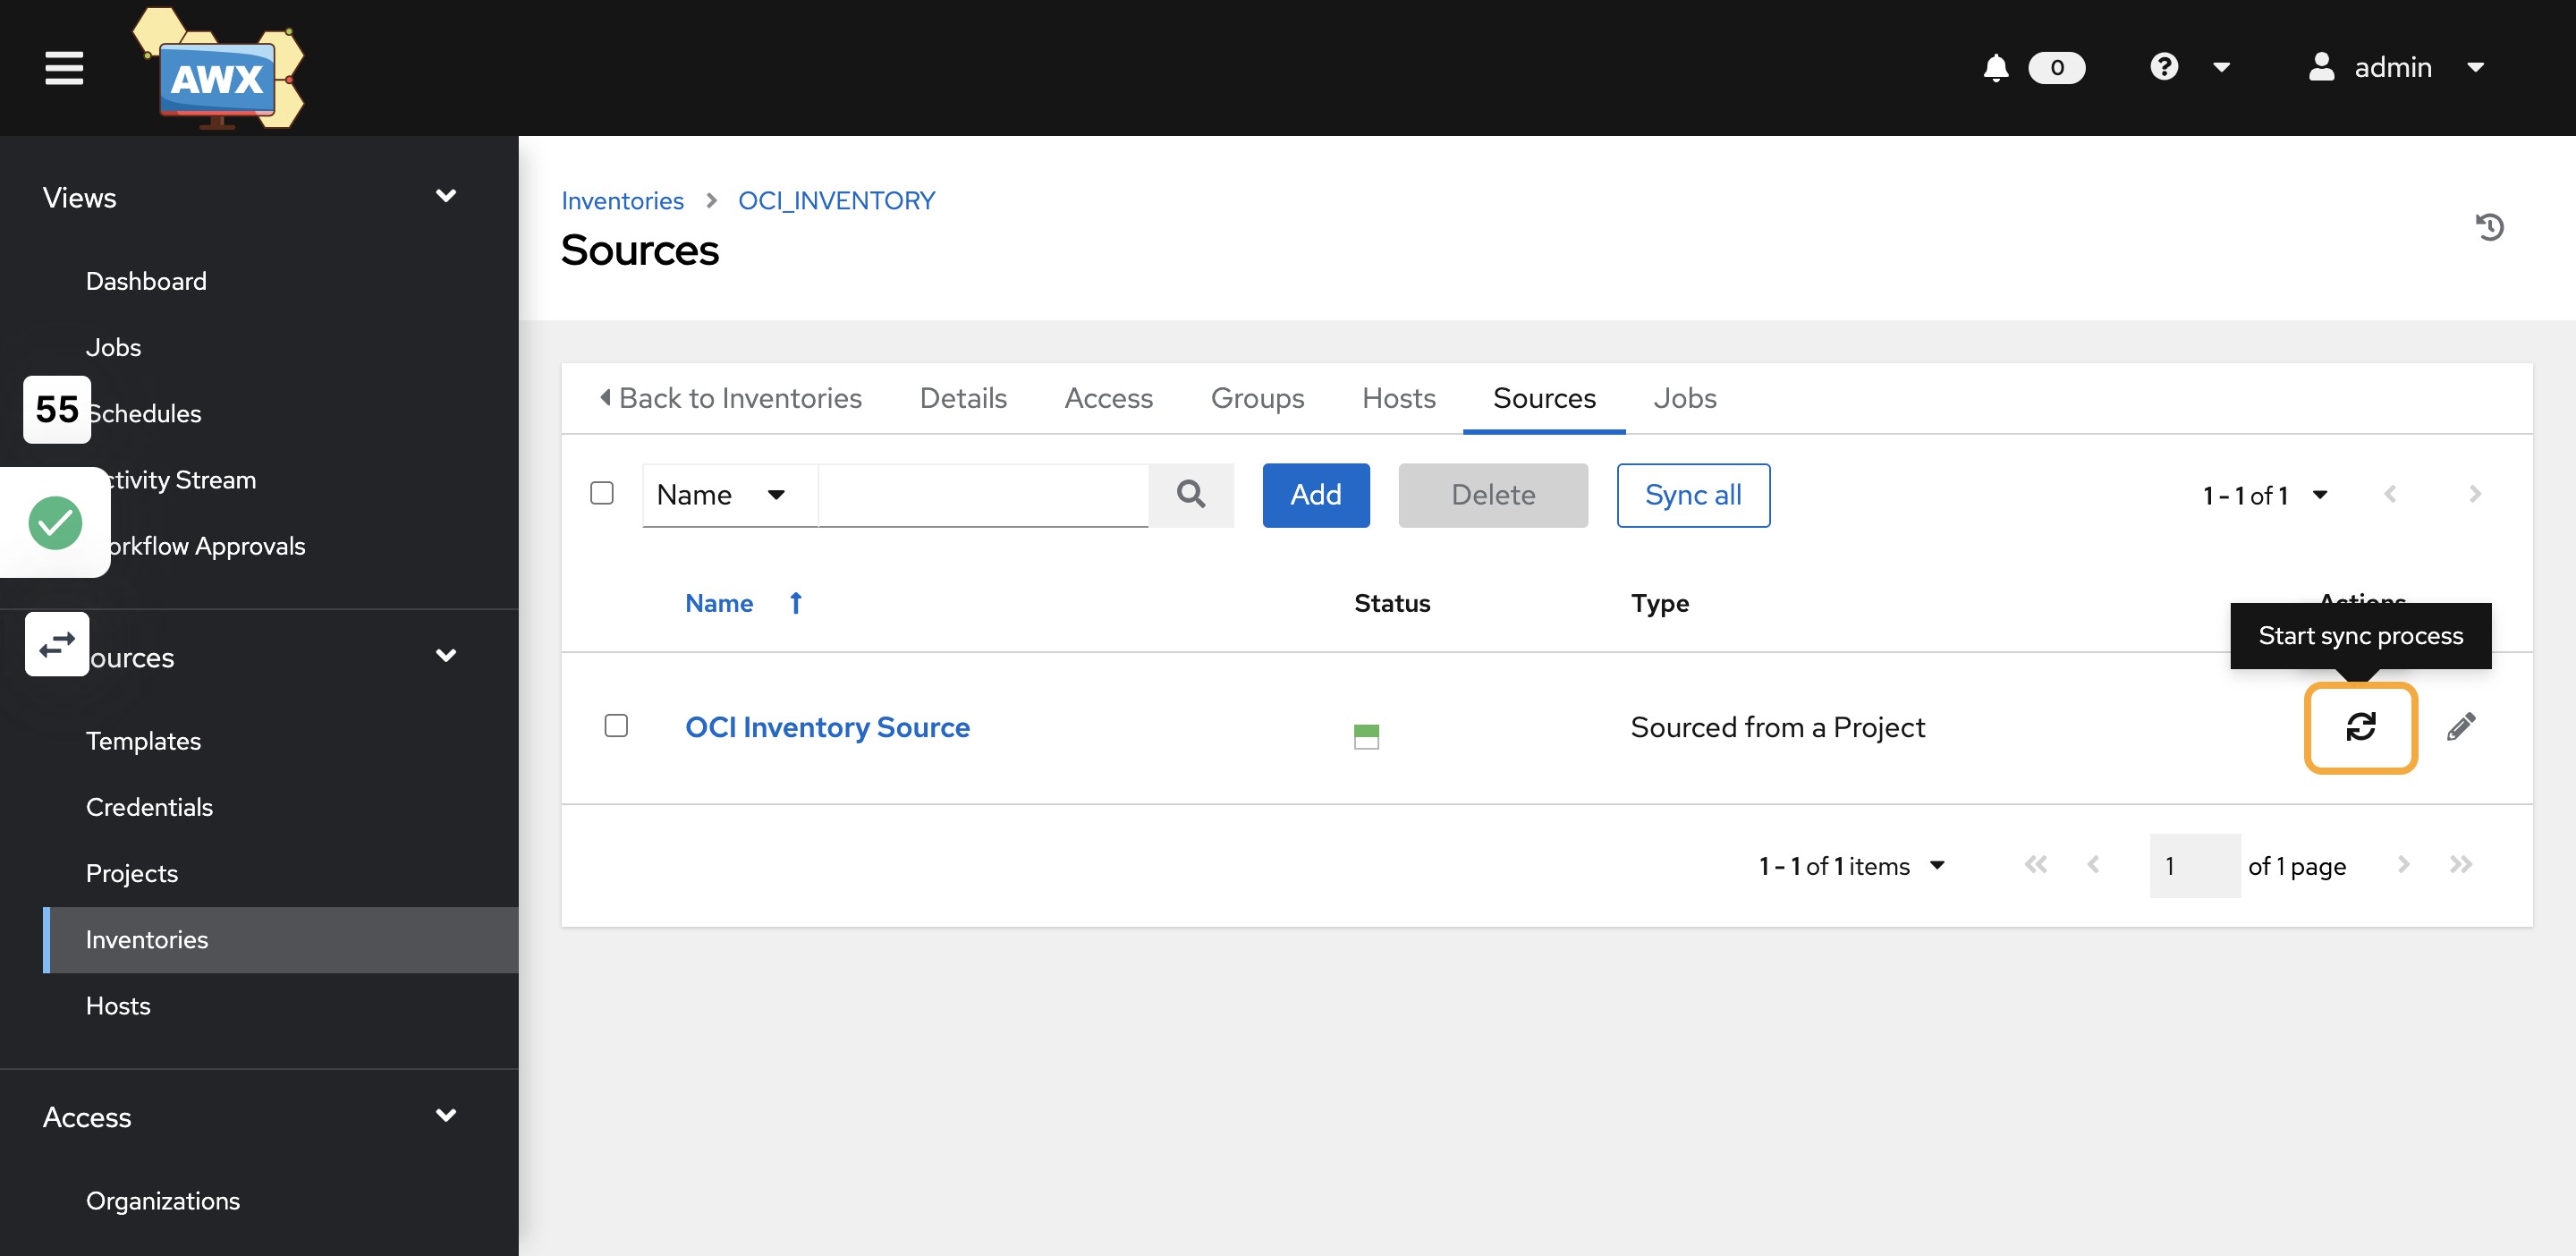
13)Finally synchronize the inventory to fetch the hosts/groups
 Follow further steps from
 AWX post deployment steps (deployed using Solution Hub) starting from #36 till end.
REFERENCE: https://github.com/ansible/awx-operator